What is VR Quest®?
Creating Your First Character
Getting Started
The Editor User Interface
Status Bar
F1 Keyboard Shortcuts
Making Your First Game
Saving A Map
Terrain Toolbar
Terrain Editing Mode
Terrain Sculpting Tool
The Slope Tool
The Blend Tool
The Leveling Tool
The Stored Level Tool
The Terrain Texture Tool
The Paint Grass Tool
Entities
The Widget Tool
Scaling and Rotating
Options
In-Game Controls – Editing While Playing
Edit Entities & Terrain
Playing the Game in Virtual Reality
Playing the Game in VR with Others
Entering Social VR
Sharing/Hosting a Game
Joining a Shared Game
Exiting a Social VR Game
Entering a Teacher Code
What is VR Quest®?
VR Quest® is a fully-immersive, virtual reality game-building system – following standards-aligned free lesson plans, students learn 3D game design, re-create places of historic significance, and publish their own VR game. Then, using the included Microsoft Mixed Reality Goggles, step into the virtual world they created – alone or in multi-player mode.
VR Quest® is an incredibly easy to use, first person game creation tool.
At its simplest, you can drag and drop elements (“Entities”) onto a large, buildable terrain and very quickly create your first game.
If you’re a more advanced user, you can combine these simple tools with the built-in, LUA-based scripting language to create almost anything your imagination can conjure.
Note: To recognize your VR hardware, you may need to reboot your computer or restart the software.
Creating Your First Character
Before learning how to make your own game, you may want to play sample games first, and perhaps even play games over Social VR. For the best experience, you may want to join those games using an avatar of your choice. It’s easy to make your avatar using the Character Creator.
Simply go to the FILE menu and select “Character Creator”. When the page loads, simply select buttons on the right to change an aspect of the character. When you are done, press the SAVE CHARACTER button and give your first character a name.
When you eventually get to the Social VR stage, you can select the CHOOSE/CHANGE ONLINE CHARACTER to choose the character you have just created! You can also find your character in the “entities” section of your library.
The Editor User Interface
Let’s look at the Editor User Interface in more depth. We’ve made the interface as easy to use as possible – we’re sure you’ll pick it up quickly.
Toolbar
Icons in this toolbar provide quick access to all of the important editing functions. From here, you can raise and lower terrain, paint ground textures and grass, add waypoints, test your game and host/join in multiplayer fun.
Drop-Down Menus
Access other options by selecting drop-down menu items including all of the editor functions, saving and loading, building a standalone game, or load demo games.
Library
This window displays thumbnails of Entities (3D Models) used when making games. You can quickly access Entities you’ve already used in your level or add new ones.
Library Tabs
The Library is in three sections: Entities, Markers and Builder. Click a tab to select which area of the Library you are currently viewing.
Editor Window
The Editor window displays a Top Down or Free Flight view of the game level you are currently editing. To make level editing easy, there are a range of editing styles to suit all users. Navigate using WASD keys, Arrow Keys and Mouselook.
Memory Bar
You can place thousands of entities in a VR Quest® level, but each one takes up memory. The Memory Bar shows how much space you have left for building.
Editor Brush
When editing the terrain or painting ground textures or grass, this brush defines the area to be edited. Change the size of the brush anytime using the [+] and [–] keys.
Editor Mode
When you open the Editor, you start in the default Top Down mode. You can choose between Free Flight or Top Down modes when editing and can easily swap between these by pressing F to enter free flight or G to return to top down mode.
Status Bar
Here you can see exactly what mode you’re in, and where the cursor is on the world map.From left to right:
| NAME | DESCRIPTION |
| Terrain Painting Mode (Terrain mode only) |
Indicates terrain sculpting or terrain painting |
| Terrain (Terrain mode only) |
Describes the type of tool, e.g. Shape mode or Ramp mode for Terrain Editing; Rock or Grass for Paint mode. |
| Entity Editing Mode (Entity mode only) |
Visible when in Entity Editing mode. You can change between Entity mode and Terrain mode from the toolbar. Useful Tip: R rotates an entity and ENTER finds the nearest surface. |
| Entity | This will either show “None Selected” or the Entity Number, Entity Name and the current status (Static – means it is just scenery, or Dynamic – means it does something in the game. |
| Clip | Indicates the current Clip mode, this can be off or shows the Clip level. Use CTRL+Wheel to adjust the clipping height. |
| X | This is the current brush X position. X is left and right. |
| Z | This is the current brush Z position. Z can be thought of as up or down on the map. |
| Normal | Default Grid mode. Pressing B changes the mode. Normal (pixel placement), Snap (snaps to the nearest entity), Grid (snaps to the 100x100 grid position for equal placing of entities). |
| CAP, NUM, SCR | Indicates Caps Lock, Num Lock or Scroll Lock is set. These will be light grey if not set; black if set. |
|
General Keys |
|
|
F1 |
Quick Help Key |
|
Arrow Keys |
Move 3D View Position |
|
1-6 |
Rotate Entity (X+, X-, Y+, Y-, Z+, Z-) |
|
R |
Rotate Entity (Y + 45) |
|
Control + R |
Rotate Entity (Y + 1) |
|
Terrain Editing |
|
|
T |
Terrain Editing |
|
LMB |
Raise Terrain or Paint |
|
LMB + Shift |
Lower Terrain or Paint |
|
Entity Editing |
|
|
E |
Entity Editing |
|
B |
Grid Mode (3 modes) |
|
LMB |
Mouse Select and Paint Entity |
|
LMB + Drag |
Select Group |
|
DELETE |
Delete if Extracted |
|
Y |
Entity to Dynamic/Static (Red/Green) |
|
RETURN |
Place Entity on Top |
|
PAGE UP |
Move Entity Up |
|
PAGE DN |
Move Entity Down |
|
U |
Toggle Auto-Flatten |
|
I |
Spray Entity Mode |
|
TAB |
Clip All Entities (L+Drag Link Entities) |
|
WayPoint Editing |
|
|
P |
Waypoint Path Editing |
|
Markers |
|
|
– |
Decrease Range |
|
+ |
Increase Range |
|
Test Game |
|
|
W, A, S, D |
Move Around |
|
Mouse |
Look Around |
|
Space |
Jump |
|
C |
Hold Down to Crouch |
|
Shift |
Hold Down to Run |
|
Tab |
Calls Up Metrics for Frame Rate |
|
Tab Again |
Calls Up Settings |
|
F1-F4 |
Create Level Lightmaps |
|
F9 |
Edit Mode |
|
F11 |
Show Hardware Info/FPS Only |
|
Map Movement |
|
|
< |
Zoom into Map/Cull Draw Distance |
|
> |
Zoom out of Map/Extend Draw Distance |
|
Mouse Wheel |
Zoom In and Out of Map |
|
Shift |
Increase Speed of Zoom/Draw Distance |
|
RMB + Mouse |
Free Flight View |
|
RMB + WASD |
Free Flight Move |
|
G |
Switch to Top Down View |
|
F |
Switch to Free Flight View |
Making Your First Game
Now that you’ve had an overview of the Editor, let’s create our first game by following the steps below. Remember, that if you make a mistake while editing, you can use the Undo menu item (Edit > Undo) or by pressing ‘CTRL’ and ‘Z’ and this will reverse the last action.
If this is your first game in VR Quest®, we advise saving several copies of your map, in case you make a mistake that Undo can’t rectify, as Undo only reverses the last action taken.
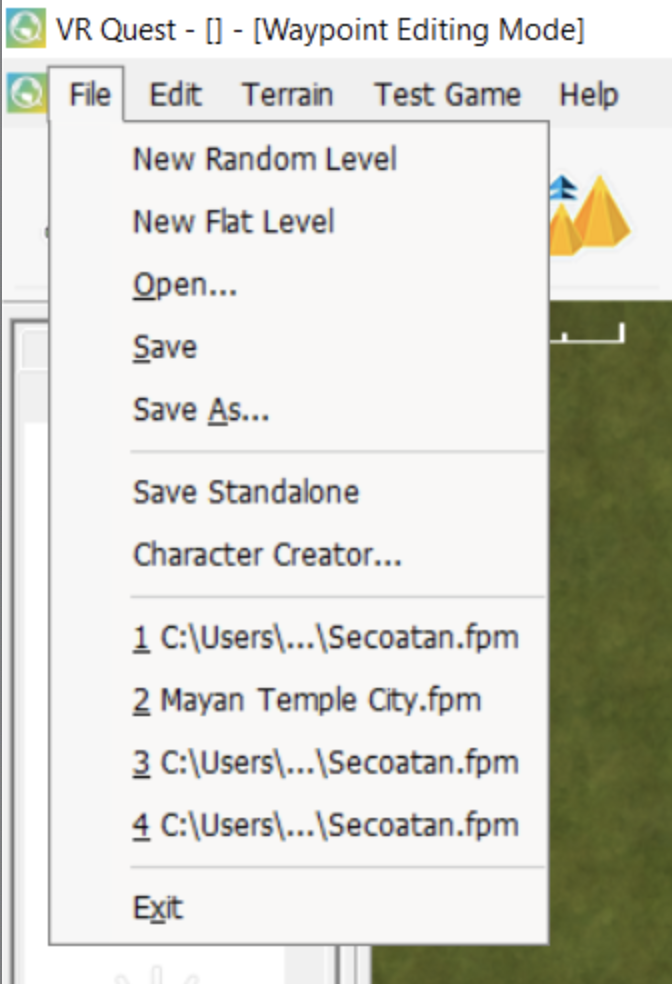
Saving A Map
Clicking on File at the top left of the menu bar will produce a dropdown menu. We’ll discuss each of these in more detail as we work through the process of making our own game, but for now, all we’re interested in are the ‘Save’ and ‘Save As’ options menus.
As with most applications, ‘Save’ will either save the map using the last name, or prompt for a new name if this is the first save. ‘Save As’ will always prompt for a new name. To ensure that you have plenty of backups of your map, it’s a good idea to get into the habit of occasionally using ‘Save As’ to make copies of your hard work.
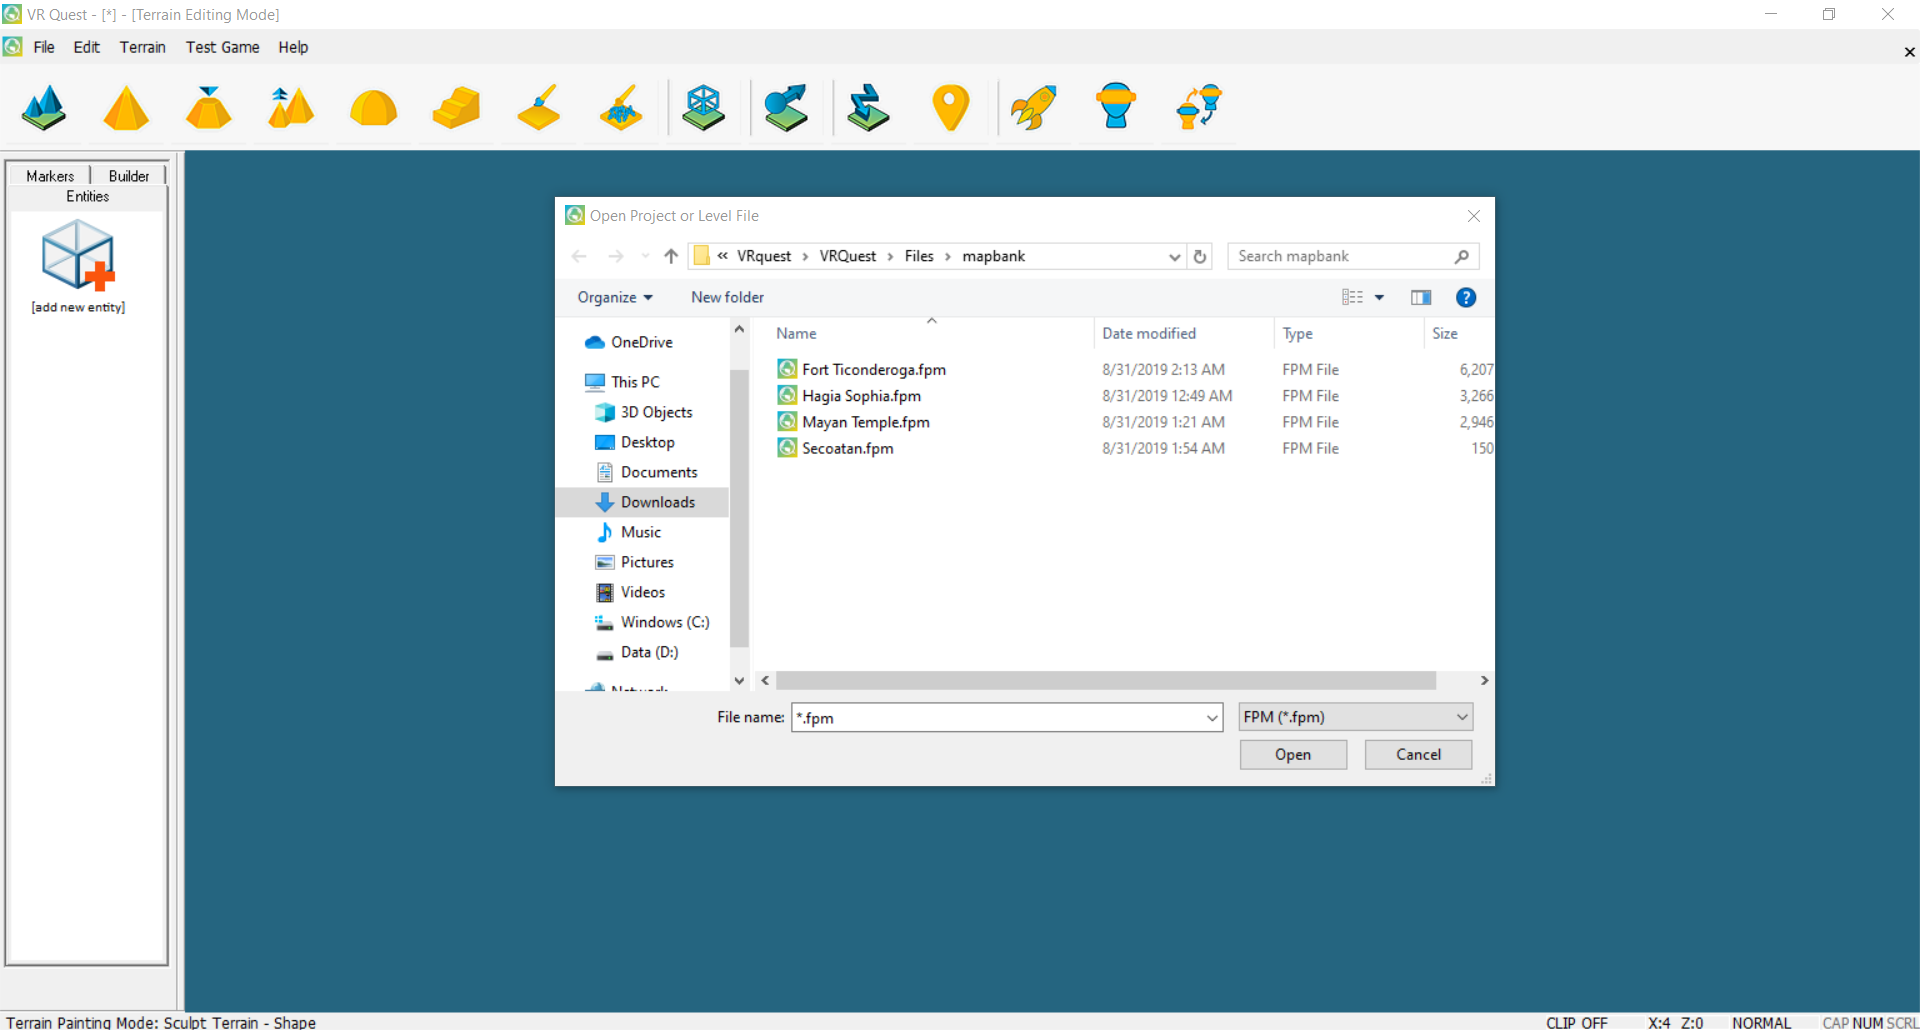
Test this by saving the default map under the name ‘MyFirstMap’. Open the File menu if you’ve not already done so and click ‘Save’. This will take you to the VR Quest® mapbank folder where all map files are stored. Maps are called FPMs which stands for First Person Maps. This is a legacy term, and applies to all maps.
Click on the box called file name and enter the name ‘MyFirstMap’ and click ‘Save’. This might take a few seconds depending on your system.
After saving and before editing, let’s go over the navigation keys so you can move around your map. You can do this using W to move up the map, S to move down, A to move left and D to move right; you can also use the arrow keys. Give this a try now so you’re comfortable with navigating.
Zoom in and out using the mouse wheel. If you take a peek at the status bar, you’ll notice the X and Z values changing. You will find this very useful when your map becomes full and you have a lot of different sections.
Now that you can move around the map freely, we can move on and start editing.


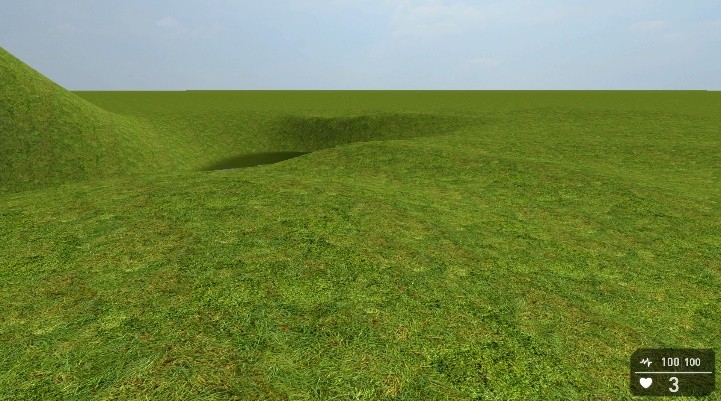
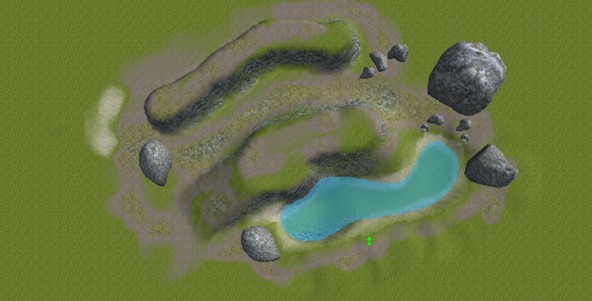
Terrain Sculpting Tool
Click on this icon to enter Terrain Sculpting mode.
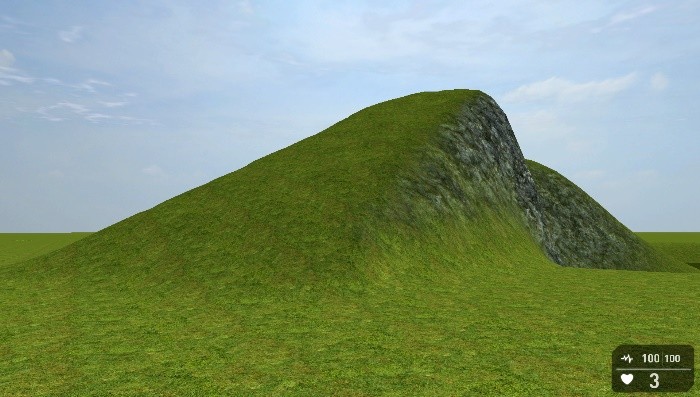
Now, move the mouse to the editor window so you can see the EDITOR BRUSH. Hold down the Left Mouse Button and move the brush around. You will see the terrain rising. Do this for a few seconds until you’ve got something that looks something like this:
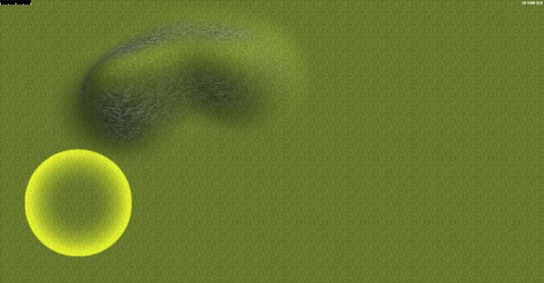
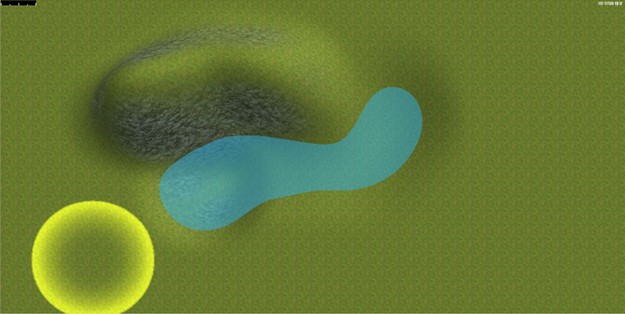
Congratulations, you’ve made your first hill! Now, let’s look at lowering some terrain. Use the same tool for this, but instead of just using the Left Mouse Button, you can also hold down Shift and then carve a few holes with the Left Mouse Button.
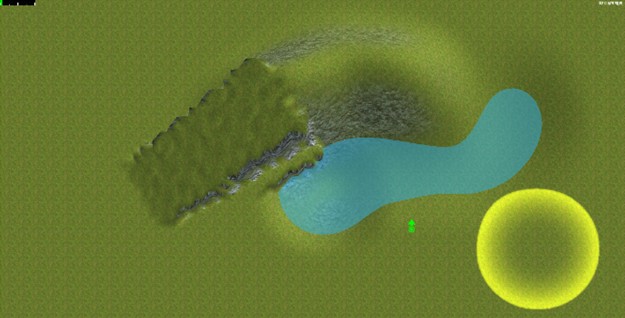
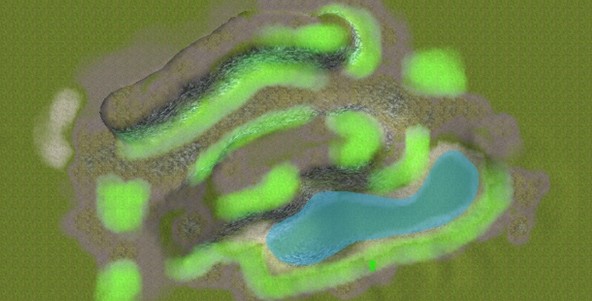
The water table for all levels is a height of 500 by default, so if you have chosen a random terrain, the hills and mountains of the randomly generated terrain may be much higher than the 500 height of the water. Keep digging and you will eventually find water!
Once the level of the terrain is low enough, you’ll see the water plane (if you like this could be thought of as sea level). So, let’s add some water. Place the editor brush in front of your new hill, hold Shift and Left Mouse Button to sculpt the terrain downwards. If everything has gone well, you should now see something similar to this:
Well done! You have created your first simple terrain.

The Slope Tool
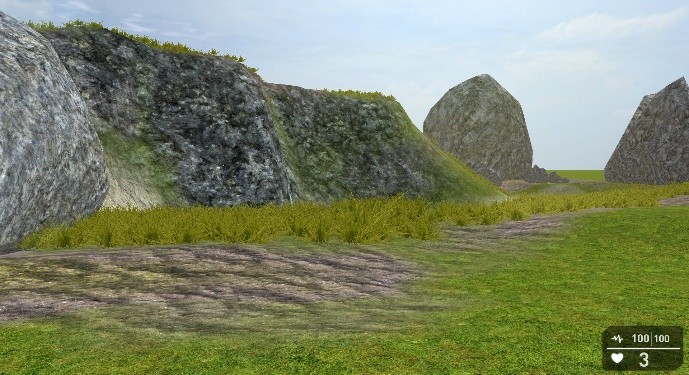
The Slope Tool quickly and easily adds terrain ramps to your games. This tool is easy to use, so let’s try it now.
Click on this icon, then Left-Click on a lower area in the Editor Window – while holding down the left mouse button, drag the Editor Brush to the top of the hill. You should see something like this:
You may notice that the sides of this ramp could be smoother, but don’t worry, there’s a tool for that too.

The Blend Tool
For a smaller or larger brush, use + and – keys. Play around with them until you have a brush of approximately the size as shown below.
Click on the Blend Tool icon; then, holding down the Left Mouse Button, brush any areas you want smoother. Zoom in or out for a better view using the middle mouse wheel. Try out different brush sizes too, if you find it easier.
Once blended, your ramp should look like this (if you want it smooth). Then, save your progress then click the LAUNCH Game icon to run around your map and see your ramp in action.
Now that you’ve got your ramp, check it’s height – you may have sculpted it higher than the terrain.

The Leveling Tool
The Leveling Tool has two functions; similar with varying results. Used on its own, you can move all terrain up or down to a single height. Try this now by leveling your hill.
Click on the icon shown at left. For this demonstration, we’ve increased the size of the brush slightly and we will be starting at the opposite end of the hill like this:

Holding down the Left Mouse Button move the brush along the top of the hill towards the ramp. Use the Blend tool to smooth over areas where the new flat terrain meets the ramp.
If all has gone well, your map will look like this:

Save your progress; then click Test Game and have a look at your new flatter terrain.
Flat terrain is fine, but may not be the natural look you’re looking for. This brings us to the second function of the Leveling tool which adds a little randomness to the smoothness, giving it a more natural look.
Access this by holding down Shift as you level the terrain. Try this around the water line.
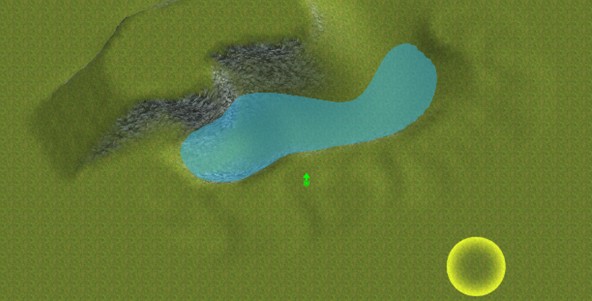
As you can see, the terrain along the edge of the water is now rougher, but still kind of level. Take a look at the Test Game now.
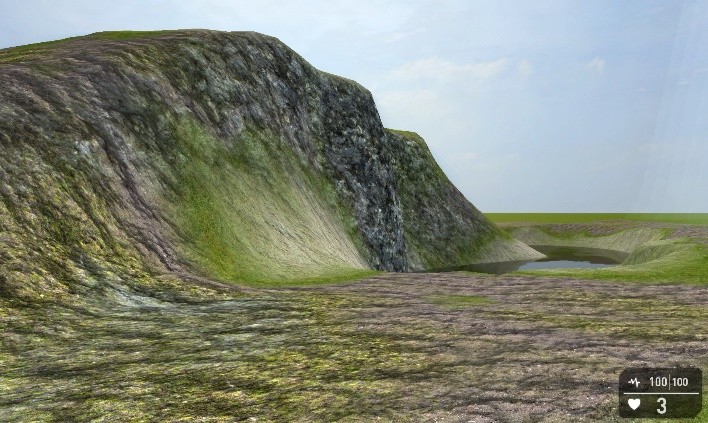
Already you will see your level taking shape, but you may still want more detail. We’ve one more Terrain Sculpting tool to look at before we can start adding some different textures to our terrain, and that’s the Stored Level tool.

This stores the last level used for future reference. Then, click on the Stored Level icon and move the Editor Brush just up from the plateau.
Hold down the Left Mouse Button to paint. As you are in Stored Level mode, all sculpting will automatically be at the same height as the stored level, like this: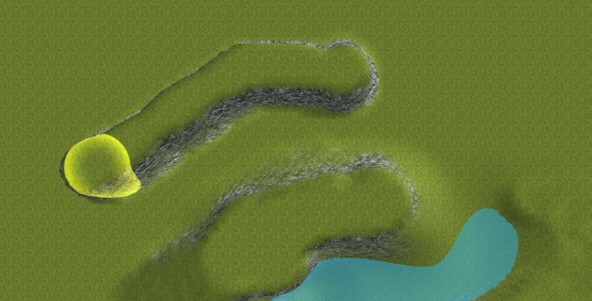
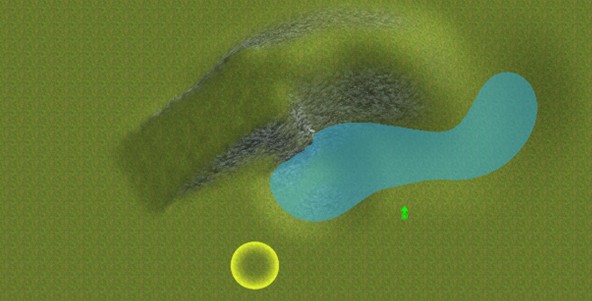
SAVE your progress before going back to Test Game to check out your masterpiece. By now, your valley will look still pretty basic, but we hope you can see where it’s going. So, it’s time to look at varying some of the terrain textures. To add a starting point to your game see MARKERS below.

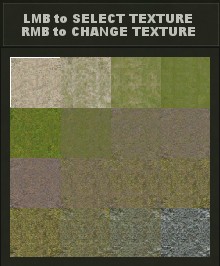
The Terrain Texture Tool
Click on this icon and you will see 16 textures to choose from that can be freely painted. You can change your terrain completely – as desert, snow, lush, wasteland, etc. We’ll explain that more later.
Notice the shortcut icons on the lower right of your screen. Clicking on any of these will allow you to paint a mix of textures onto your terrain.
Add several textures to the map to add extra depth and quality to its appearance. You can alter the size of the Editor Brush using the + and – keys. See what we have created below; feel free to add your own style to your map. Save again.
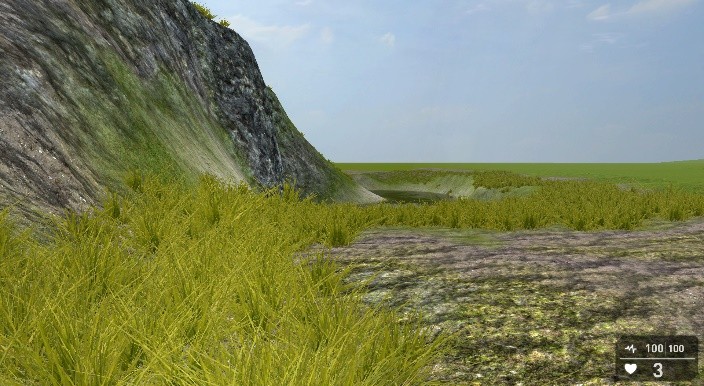
Now you’re getting somewhere. As you can see, you may still be missing a few things, so let’s look at the next painting option and add some grass.
The Paint Grass Tool
Click on this icon on the toolbar and paint grass the same way as you painted the other textures. Grass will appear as a green area on your map. The thicker and less patchy the grass appears in Editor, the more grass will appear on your map in Test Game. You can also make the grass thinner by holding down Shift at the same time as you’re painting. Save again, and take a look at the grass in Test Game.
Entities
An Entity is an object – anything that isn’t terrain or a marker – a brick, a box, a tree swaying in the wind, or a character.
Access Entities from the Library tab. Start by adding some rocks and trees from the library. On the left, click on Add New Entity to open the full Entity Library.
VR Quest® offers numerous pre-built characters from periods in history for storytelling, game creation and VR experiences. To add a character, go to Entities then select Characters and choose the character you want to use. Students may define a generic character by adding a name, title or occupation using the “Text Zone” marker. See the marker section below for details.
For now, we’re going to look at adding a little extra beauty to our level in the shape of trees and rocks. There’s plenty to choose from in the default library, so start by adding a few rocks from the Objects/Rock category. folder. Open the OBJECTS section with the + icon and then click on the Rocks sub-category text. The entities in this section will now open in the right-hand window and will look like this:
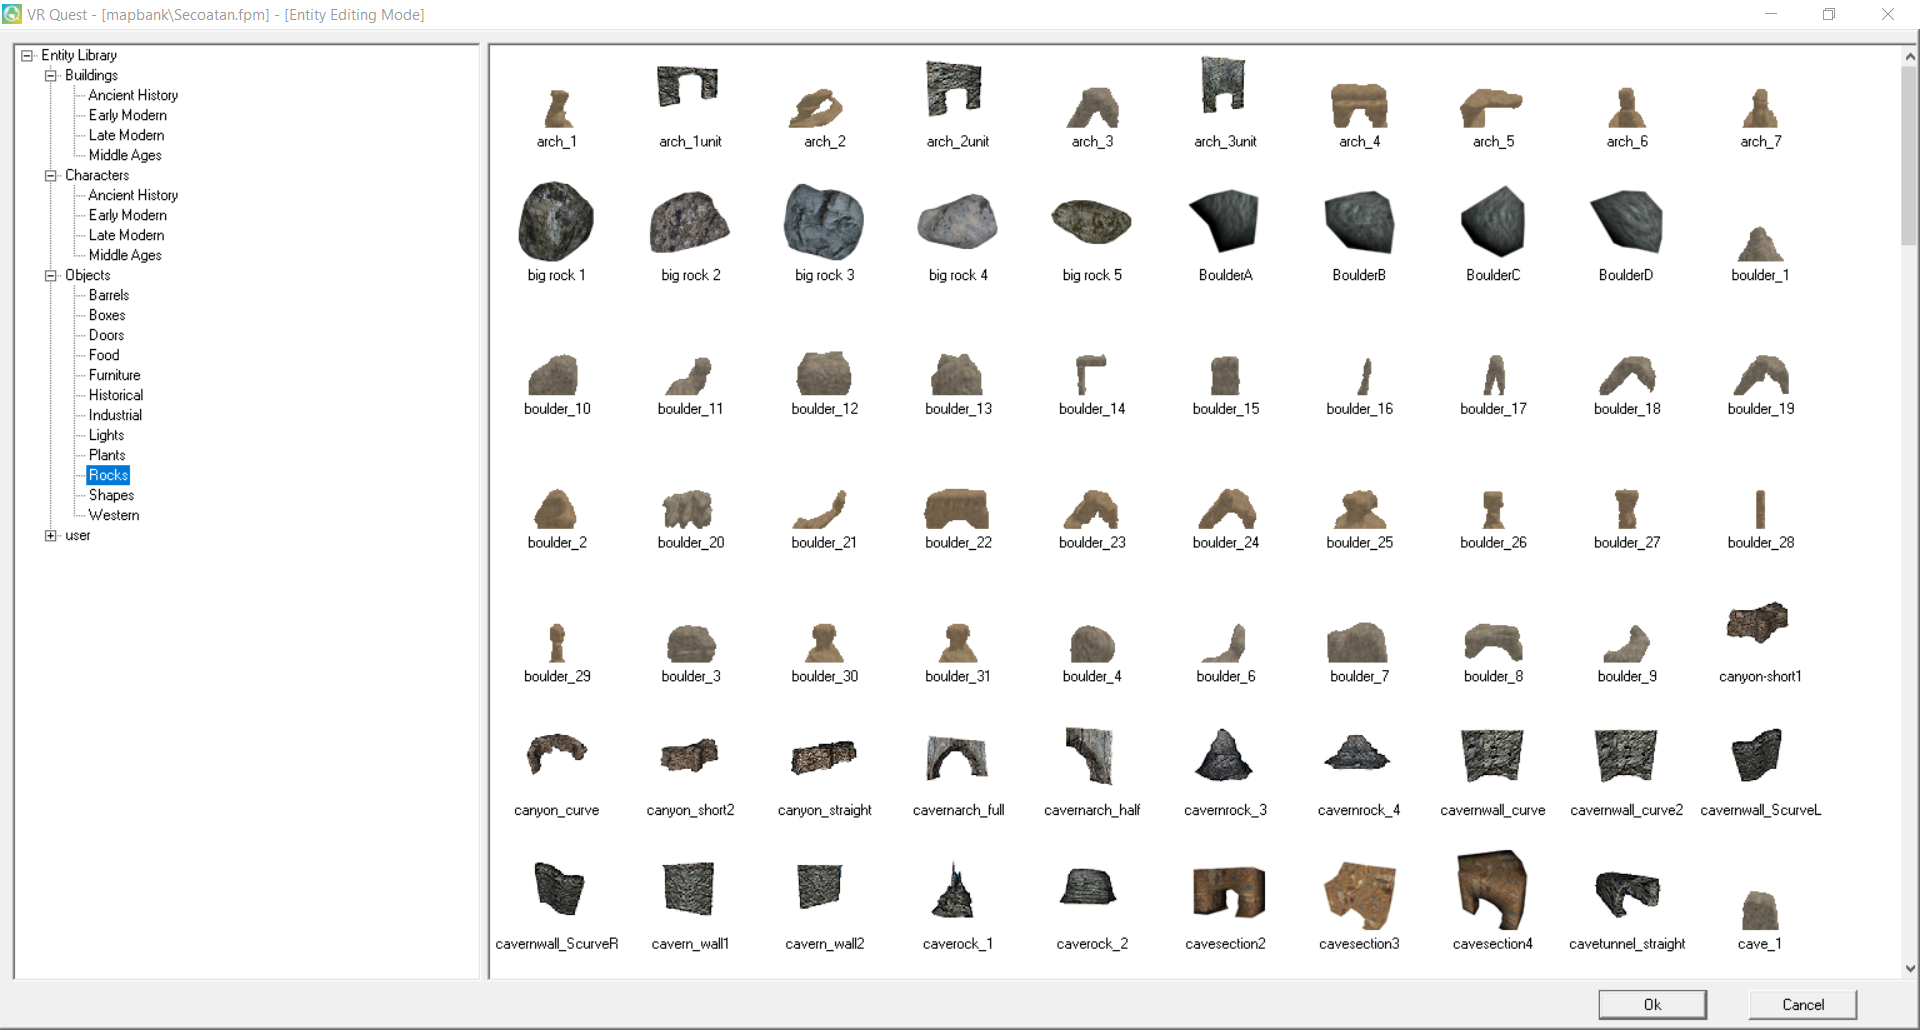
To select an entity, click on the object you want to add and move it into the Editor Window. You’ll see the model is attached to the pointer. Add rocks from between Rocks (1) and Rocks (10). Grey rocks are about halfway down the list.
Remember to Save your progress often! Now, place a few rocks around the map.
TIP: A single mouse click selects/places one entity. To place more than one, hold down Shift and press the Left Mouse Button at the same time. This allows you to select the entities you want, of the same type.
Save As again; then look at the Test Game.
Things are taking shape nicely now, but all of the rocks are facing in the default direction and are of the same size, so if would be good if we could add a little variation to each one.
This is where the widget tool comes in handy.

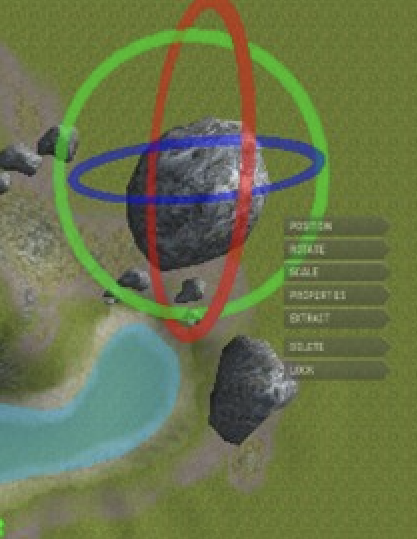
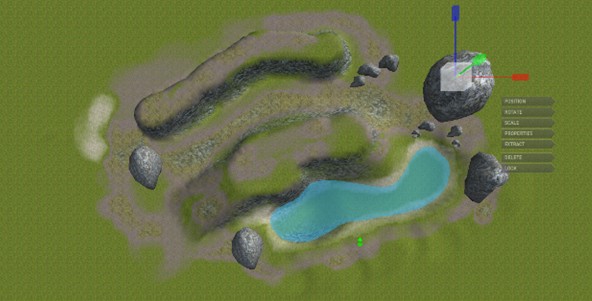
The Widget Tool
The Widget tool enables you to fine tune entities in your level, make minor adjustments to the entities position, rotate around the X, Y and Z axis, scale the entity up and down, change it’s properties (more on that later), extract completely, reposition, delete (if not needed), or lock it in place so you don’t accidently move it. For example, if you select PROPERTIES, notice the menu that will come up on the left that will give you options for that Entity, like LUA script or height.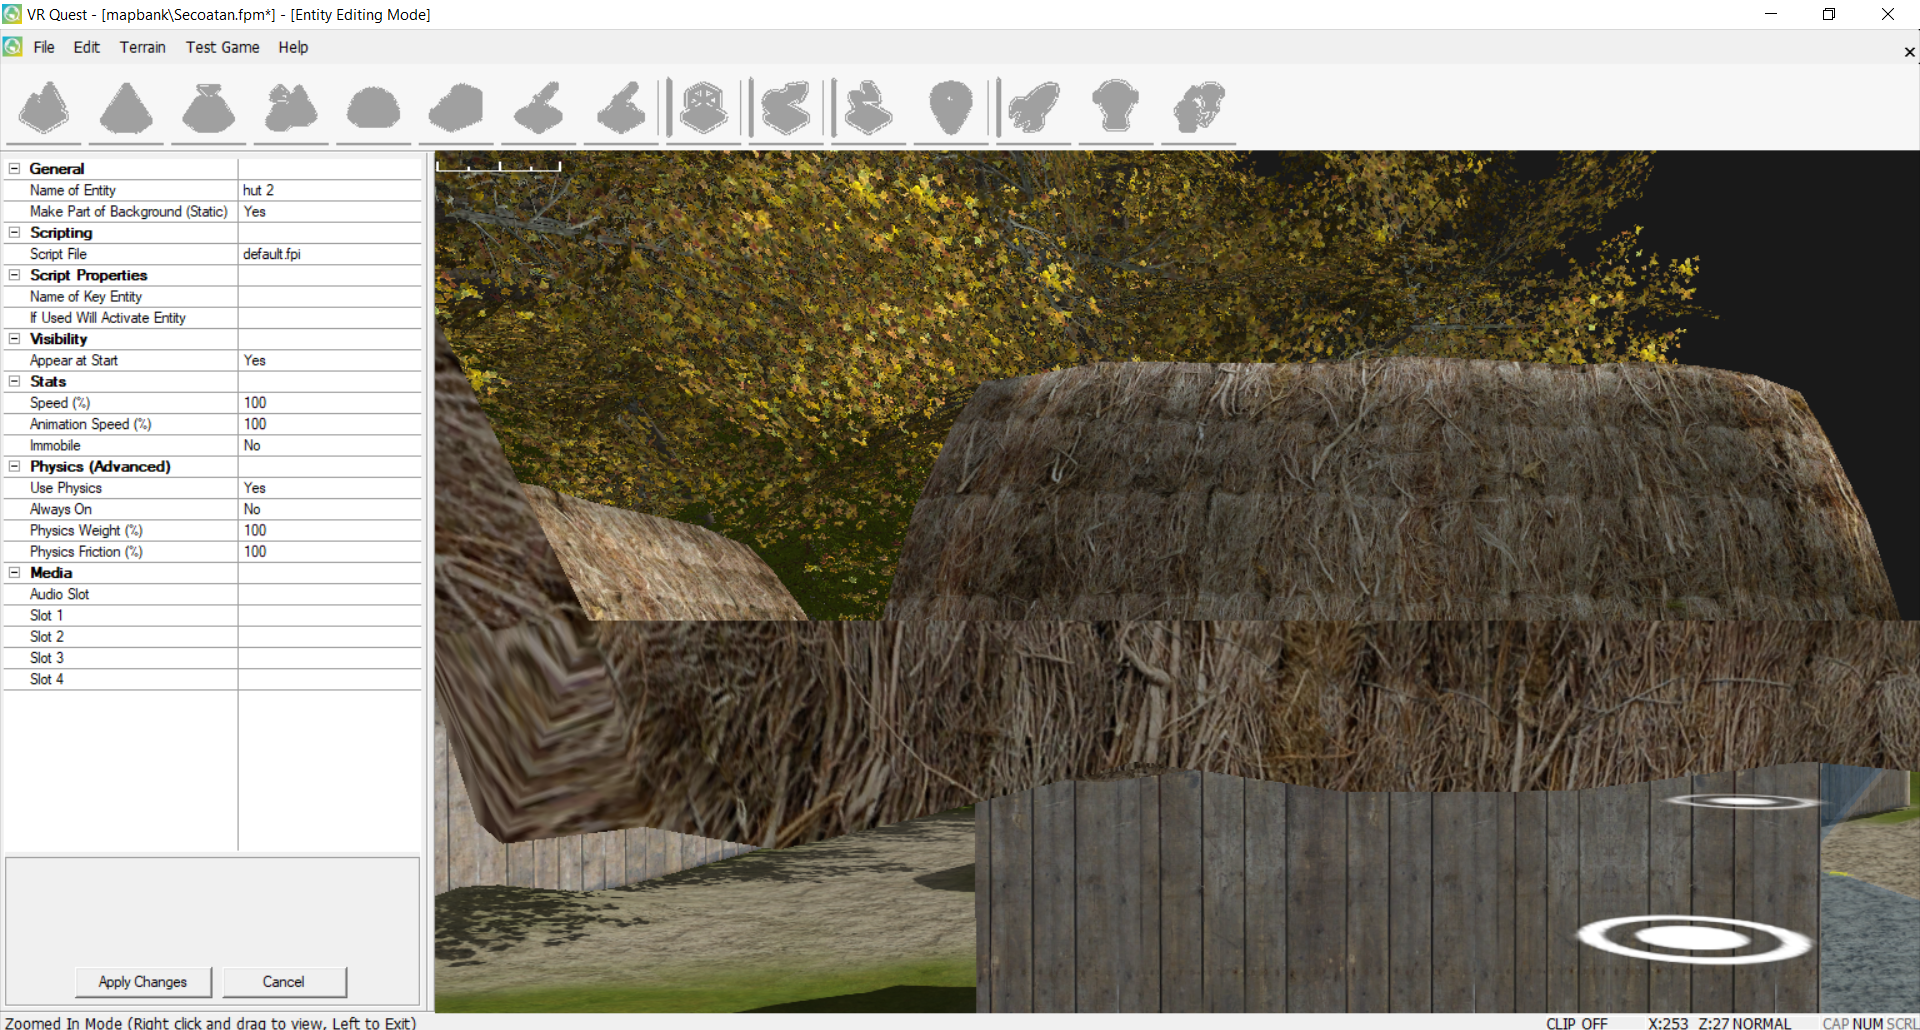
Scaling and Rotating
Left click on one of your rocks and select Rotate. We’re using a large one as an example, but this will work for any of them.
You’ll notice the three rings surrounding the entity, one for each of the three axes. In the example below we’ve rotated a few rocks. Do this yourself by holding down the Left Mouse Button while over any of the rings and dragging the mouse.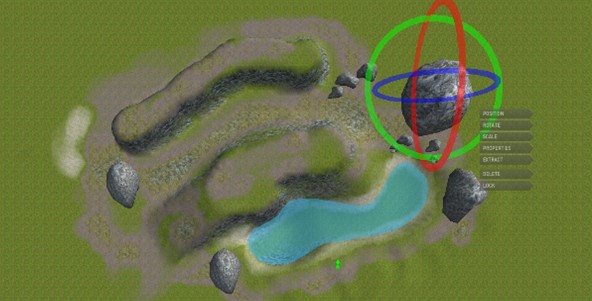
Save your changes, and take a look at scaling. Access the scale menu. You can scale along any of the 3 axes by hovering over the pointers, holding down the Left Mouse Button and dragging. You can also scale equally by hovering over and dragging the white box.
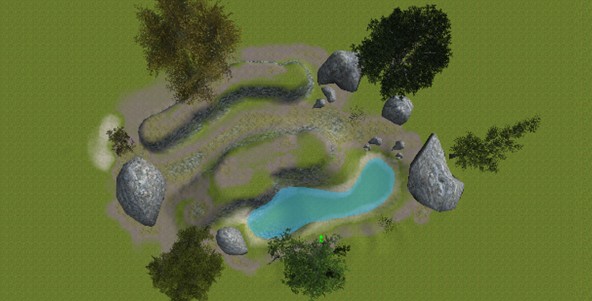
We’ve scaled a few rocks in our test map. Try this yourself; play around a little more with scaling and rotation to get a feel for it. You might need to occasionally Extract (move) the model to a better position. Go back and add a few plants and trees from the Plants and Trees sub categories in the entity library. Then, save.
You can select any of these options by clicking on the sub-menu.
|
Options |
Function |
|
Position |
This is the entities position in the game world, you can make fine adjustments to the entity position using the red, green and blue arrows of the widget. |
|
Rotate |
Use the widget wheel to turn the entity on the x, y and z axis. Click the wheel and drag to rotate. |
|
Scale |
Click and drag the arrows to scale on the x, y and z axis or click and drag on the white box to scale equally. |
|
Properties |
Changes many facets of the entities properties. |
|
Extract |
This attaches the entity to the cursor and allows you to move it to a new location by clicking the Left Mouse Button. Holding Shift will allow multiple copies of the object to be placed. |
|
Delete |
Completely removes the entity from the map. |
|
Lock |
Locks the entity preventing any changes. |
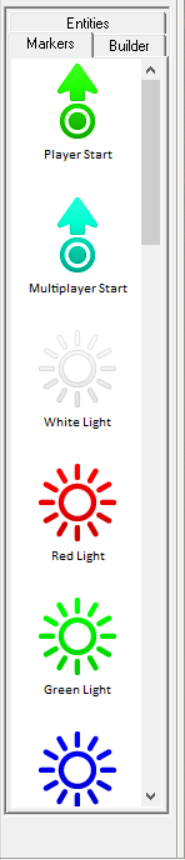
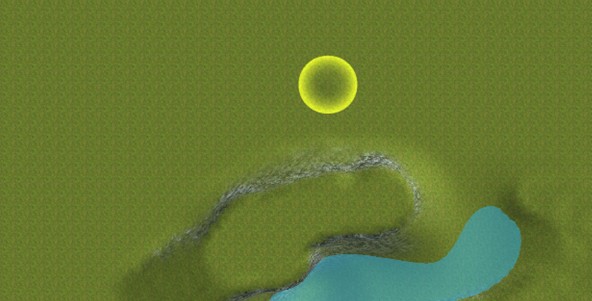
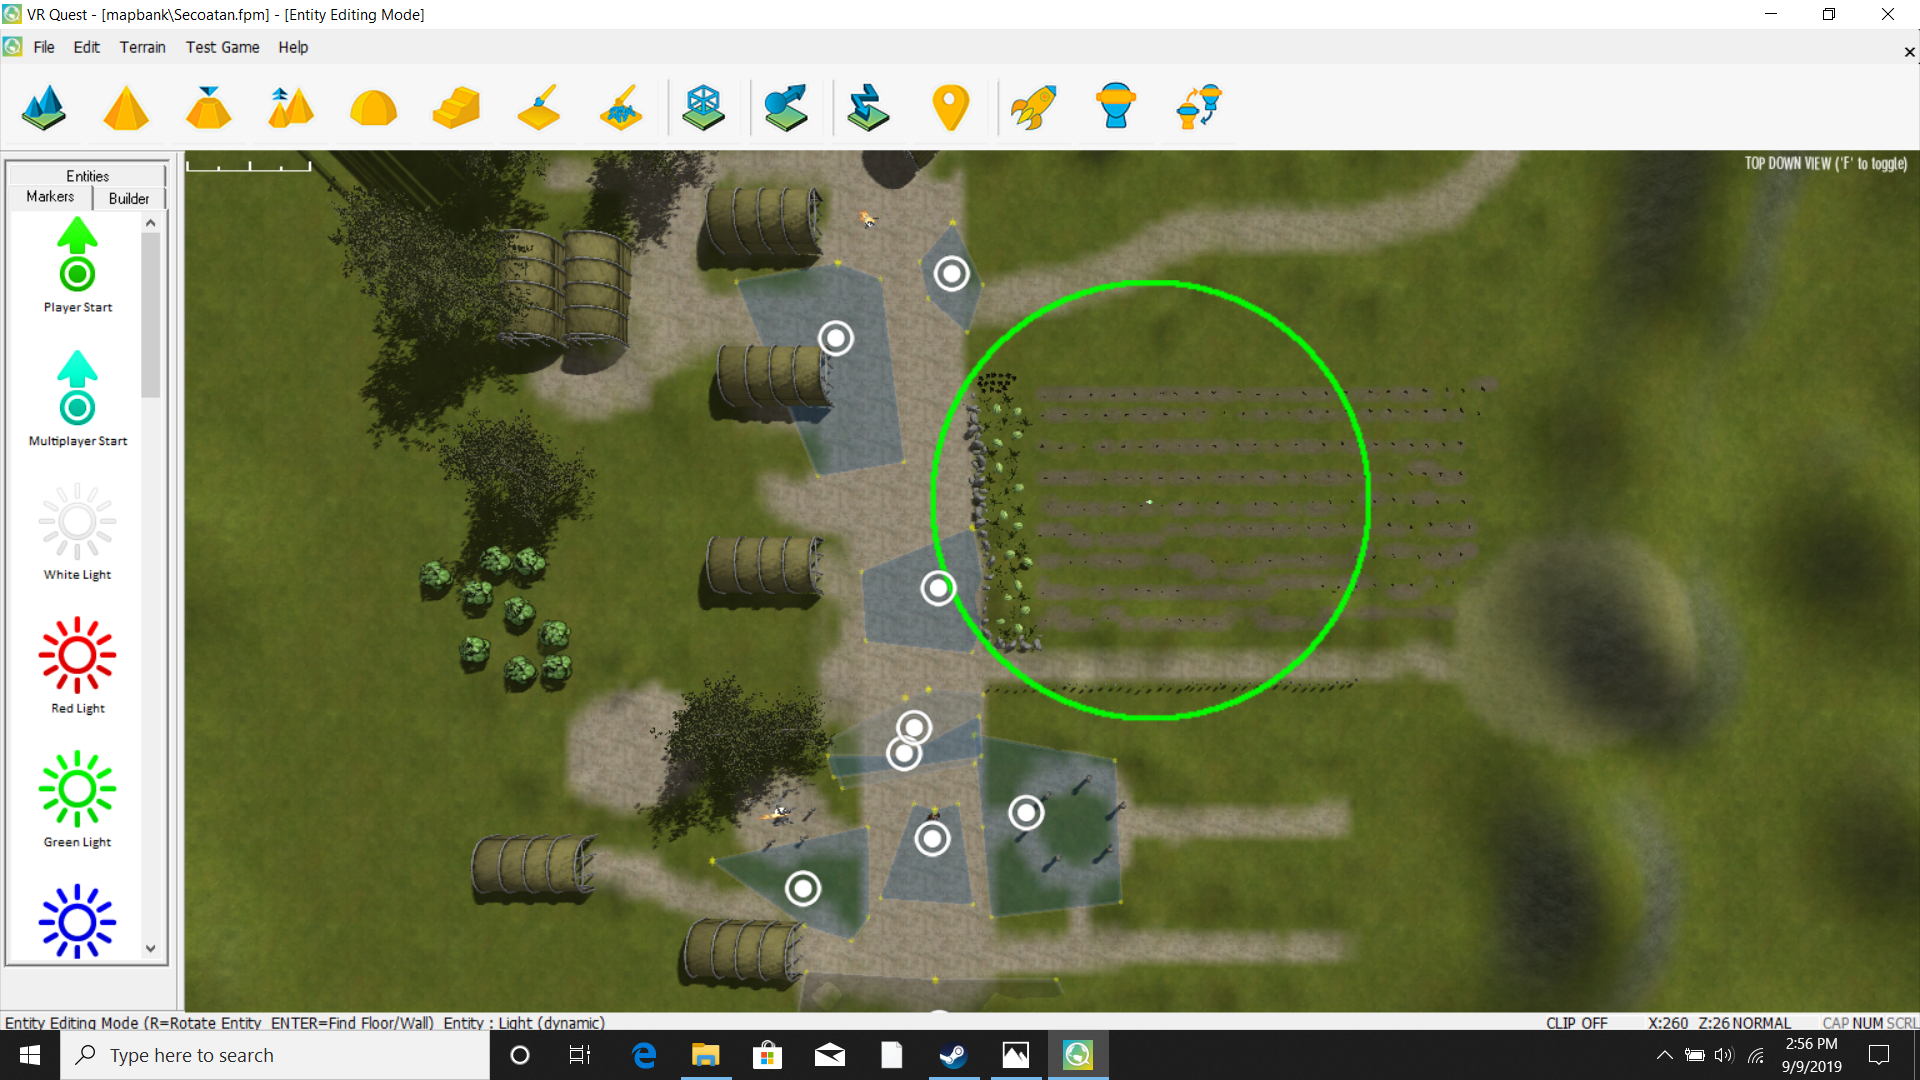
Markers
Move the mouse pointer over to the library and click Markers. You will see this submenu (shown at left).
There are several different types of Markers: Player Start, Player Checkpoint, Win Zone, Audio Zone, Text Zone, Video Zone. Each of these allow you to add certain functions
to your map:
|
Zone Selected |
Action Response |
|
Player Start |
Position this to indicate where a player will start |
|
Win Zone |
Position to indicate the end of the game – the winning point |
|
Trigger Zone |
Place this as a trigger to another action |
|
Audio Zone* |
Place this to add audio to an area. If positioned under a person, that person will speak the audio you placed. |
|
Text Zone |
Positon this and add text in a designated area |
|
Video Zone |
Place this where you want a video to be played |
|
Floor Zone |
Adds a functional option to a surface |
|
Light Zones (in colors) |
Adds light to the game where designated: white, red, blue, green, yellow or pink lights |
|
Image Zone |
Adds an image to a designated area |
|
Spotlight Zones |
Adds a focused spotlight to the game: white, red, blue, green, yellow or pink lights |
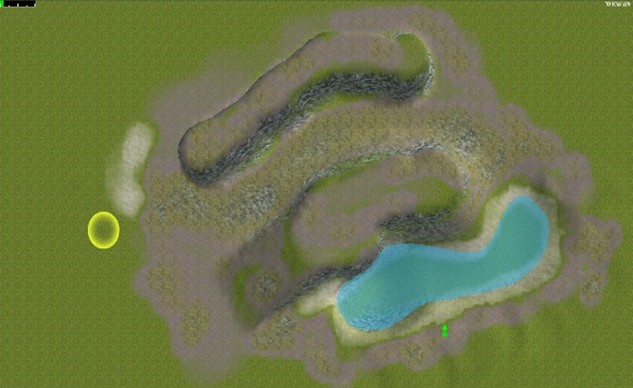
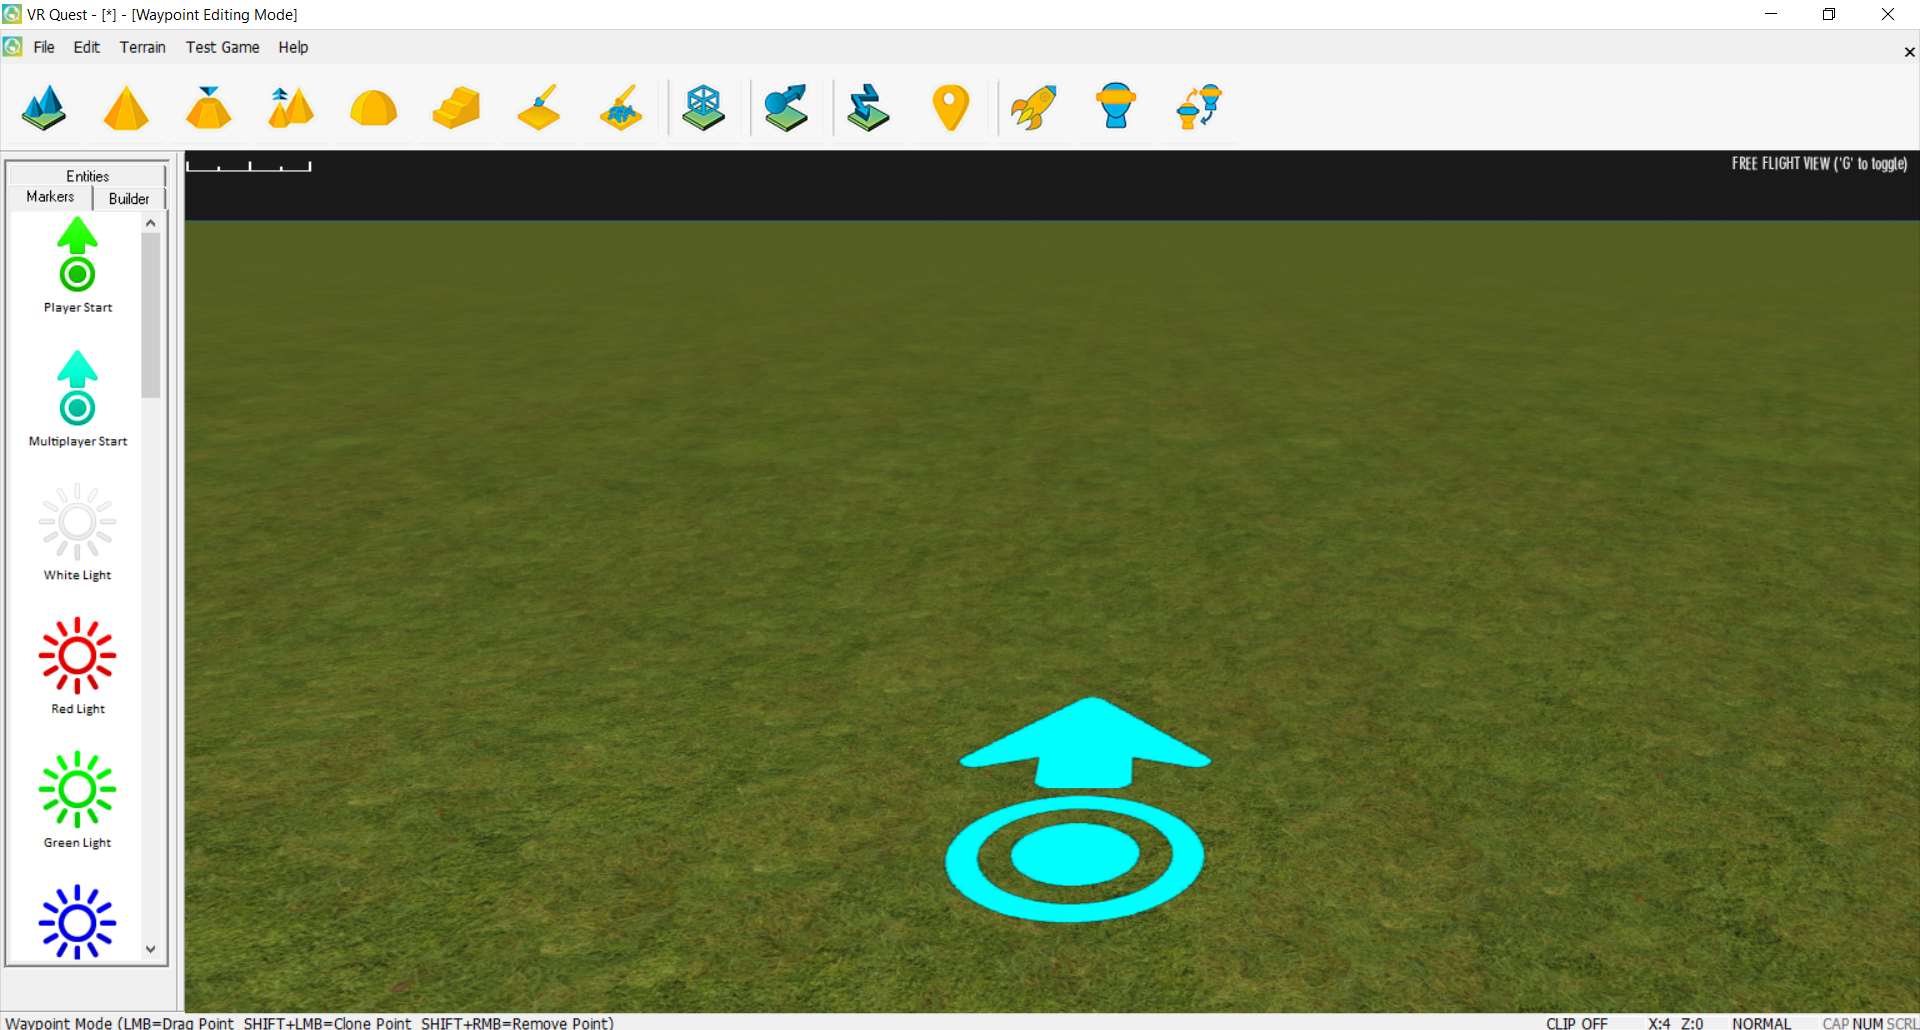
The Player Start Marker represents the position and direction the player will start from in your map. To select a Marker from the library, simply Left-Click on it and move the mouse to the main map; Left-Click again when you’re satisfied with it’s position.
Use the green Player Start Marker on the terrain for where you’d like your player to start in the game. For Multi-Player start, place the light blue marker.

It’s always good practice to save your progress, so do that now, just as you did before, but using Save As from the File menu. Save your map under the new name MyFirstMap2.fpm. You can use any name you want, but for this tutorial, we recommend using the same names as we are.
*Note: When placing an Audio marker, you must have the MP3 file you want in the Audio Bank. The program looks in that specific folder for any audio file you may want to use.

![]()
Win Zone
Now for the final part – adding a Win Zone. We’ve decided for our level that the player simply has to cross the map and enter the Win Zone to escape, to let’s place one.
As we mentioned, the Win Zone is just another type of marker. Move your Editor Window view to where you want to place your Win Zone.
Click Markers and select Win Zone from the Library Window (scroll down to find it).
The zone icon will attach to your pointer to be placed manually with the Left Mouse Button.

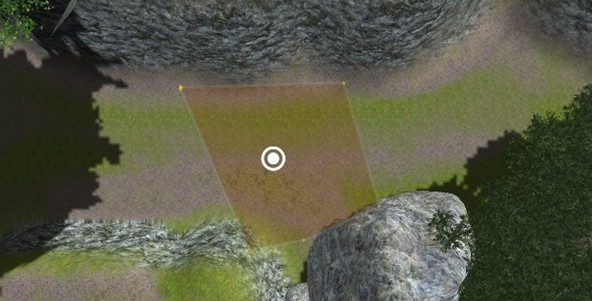
We want our Win Zone to cover an area large enough so the player can win by entering it from several directions, so we’re going to move our node to increase the zone size.
Save your progress, then test out the final, small but complete, level.
When you enter the WinZone, take a look at the bottom of the screen. You will see the message Level Complete triggered. In test game, this indicates that the level is over, but you can still move around and try other things.
If you’ve built a standalone game, your game will either end if this is the last level, or load in the next level.

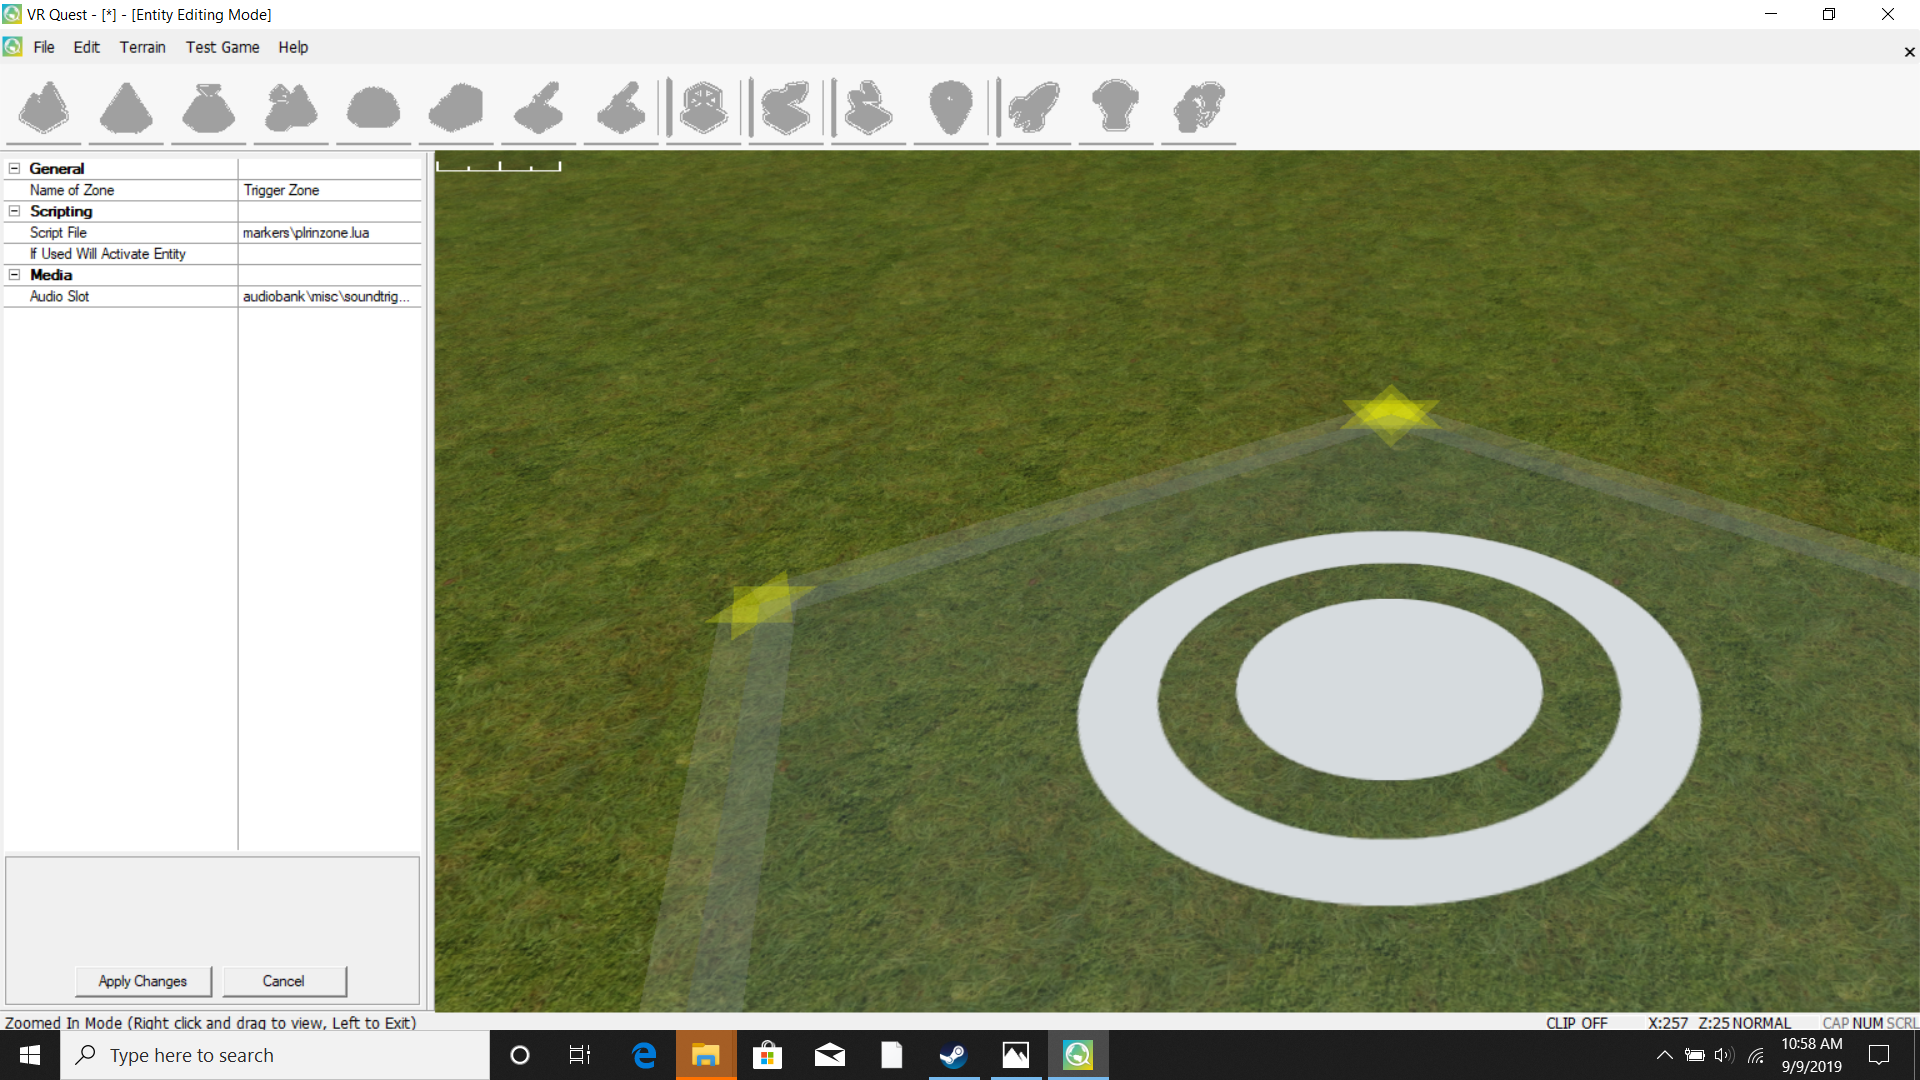
Trigger Zone
The trigger Zone is another type of marker. Move your Editor Window view to where you want to place your trigger zone. Click Markers and select Trigger Zone from the Library Window (scroll down to find it). The zone icon will attach to your pointer to be placed manually with the Left Mouse Button.
Once you have placed the marker. Select it, and then select properties. In scripting select the LUA script you would like to use. Press Apply. Now when you play the game, when you walk over the zone, the trigger you specified will activate.

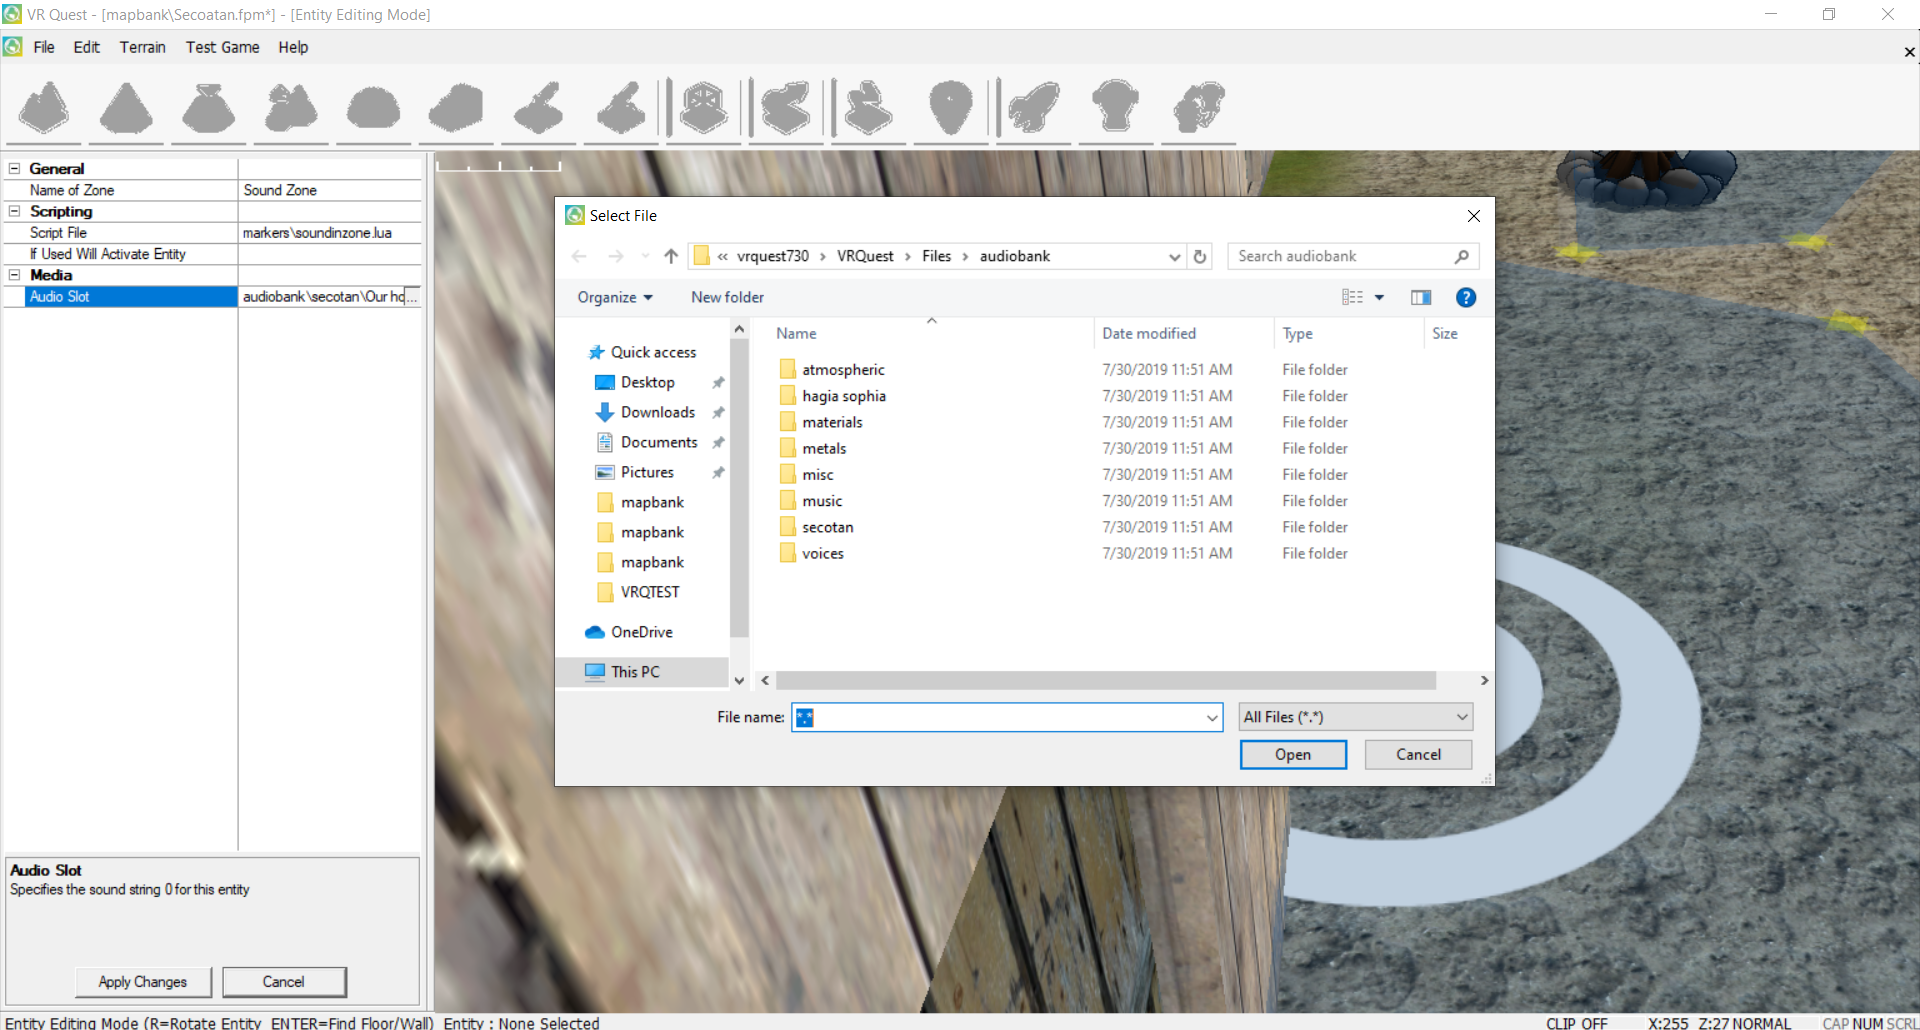
Audio Zone
The Audio Zone is another type of marker. Move your Editor Window view to where you want to place your trigger zone. Click Markers and select Audio Zone from the Library Window (scroll down to find it). The zone icon will attach to your pointer to be placed manually with the left mouse button.
Once you have placed the marker. Select it, and then select properties. Under Media, press the three dots next to the Audio Slot row. An audiobank folder will pop up. Select the audio you would like to hear for this zone. The Audio Zone uses .wav files. Students can choose to record their own voices and store them in the audiobank folder.

Video Zone
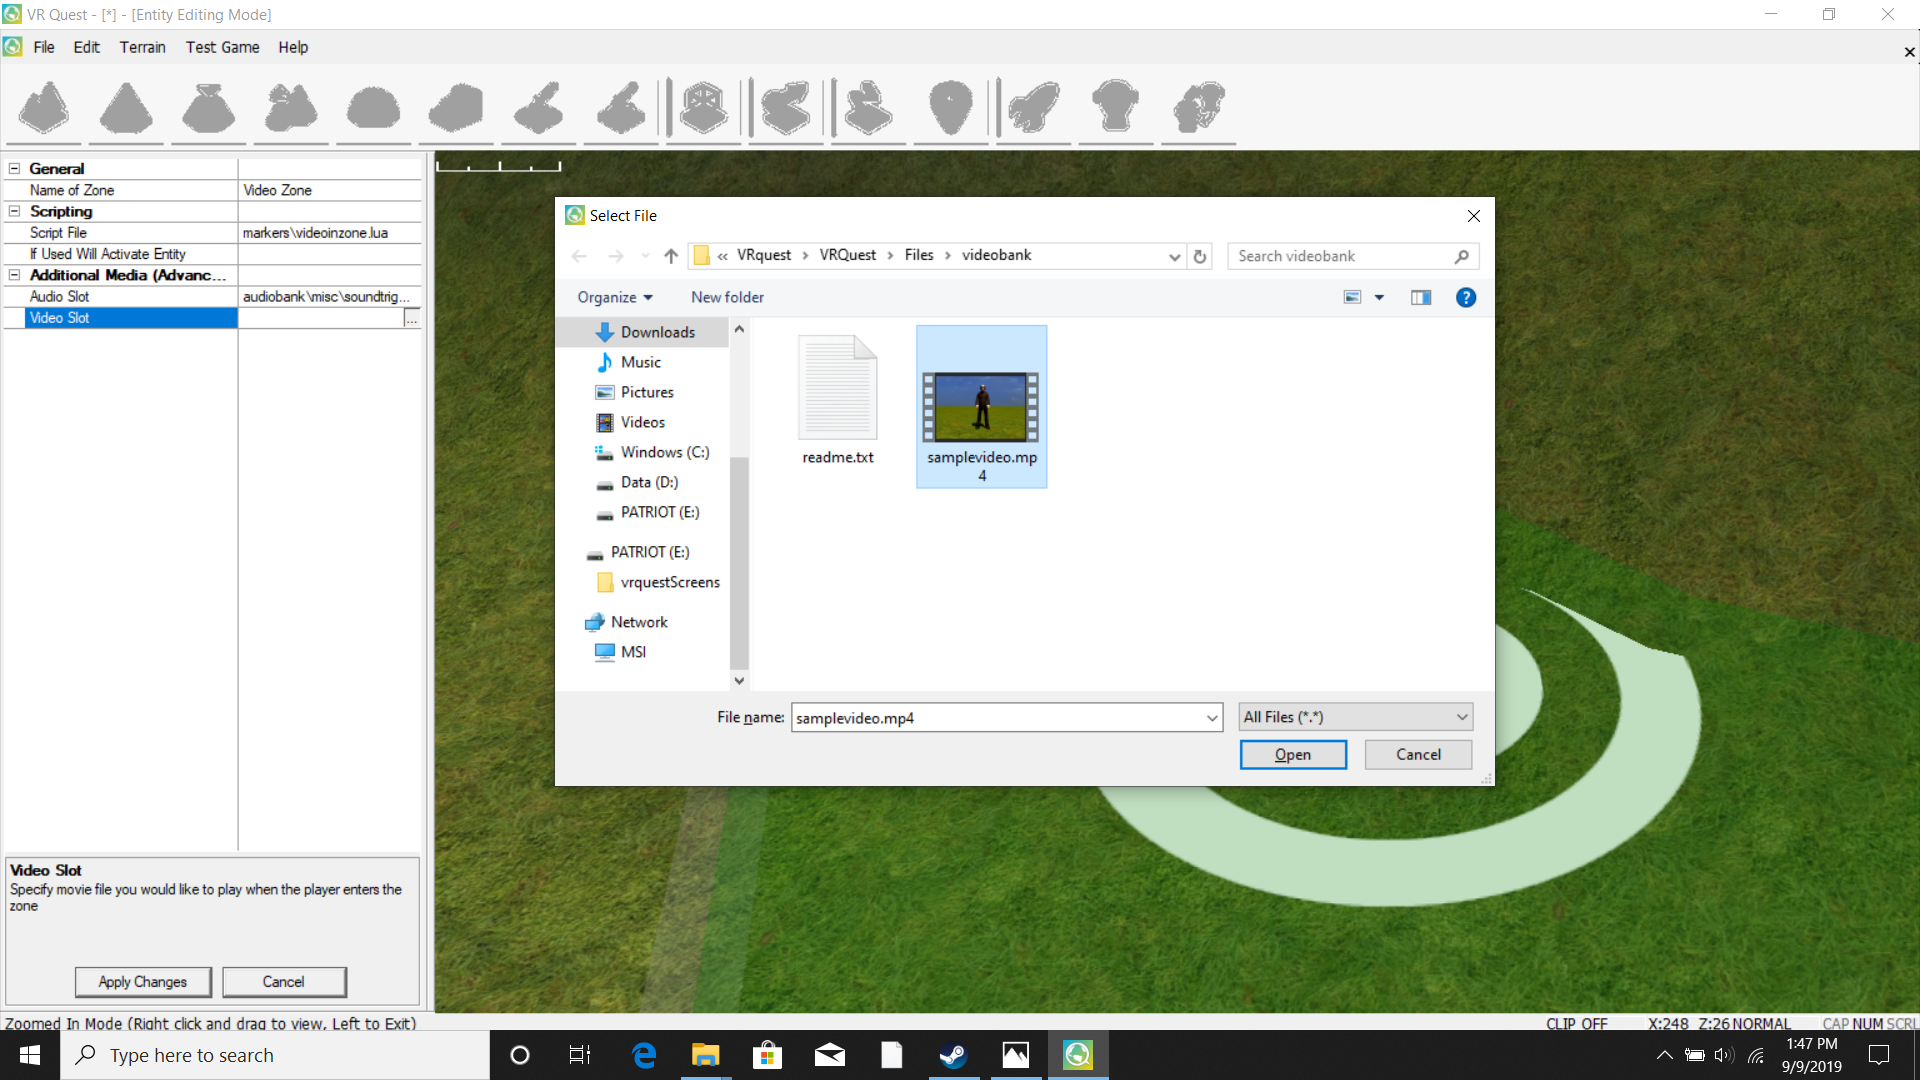
The Video Zone is another type of marker. Move your Editor Window view to where you want to place your trigger zone. Click Markers and select Video Zone from the Library Window (scroll down to find it). The zone icon will attach to your pointer to be placed manually with the left mouse button.
Once you have placed the marker. Select it, and then select properties. Under Additional Media, press the three dots next to the Video Slot row. A videobank folder will pop up. Select the video you would like to hear for this zone. The Video Zone uses .mp4 files. Students can choose to save videos in this folder if they want to use them in the game as a resource.
Text Zone
The Text Zone is another type of marker. Move your Editor Window view to where you want to place your trigger zone. Click Markers and select Text Zone from the Library Window (scroll down to find it). The zone icon will attach to your pointer to be placed manually with the left mouse button.
Once you have placed the marker. Select it, and then select properties. Under Text, find the column next to the Text To Appear column. It should say “Hello World”, type the text in that column that you would like to appear when moving over that zone.
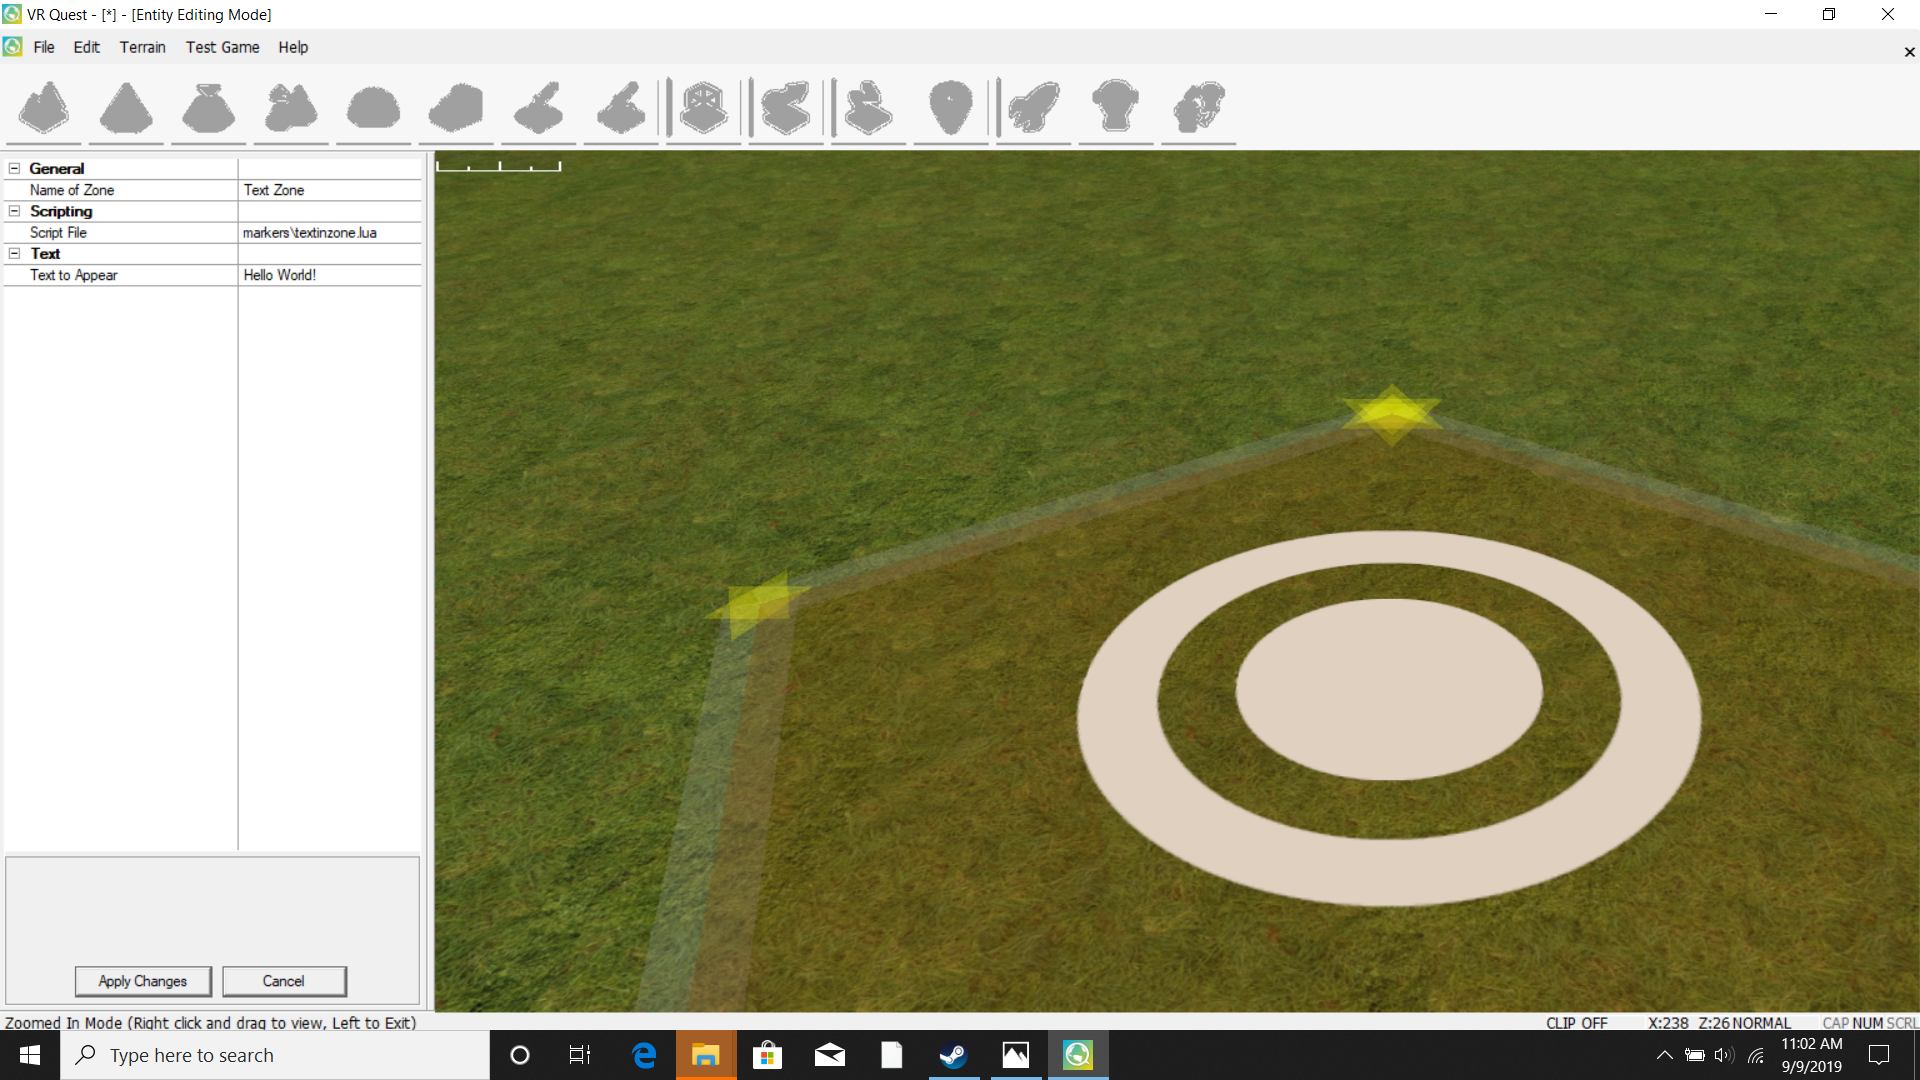
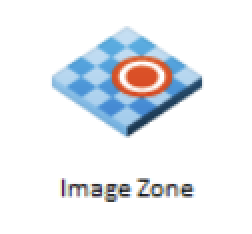
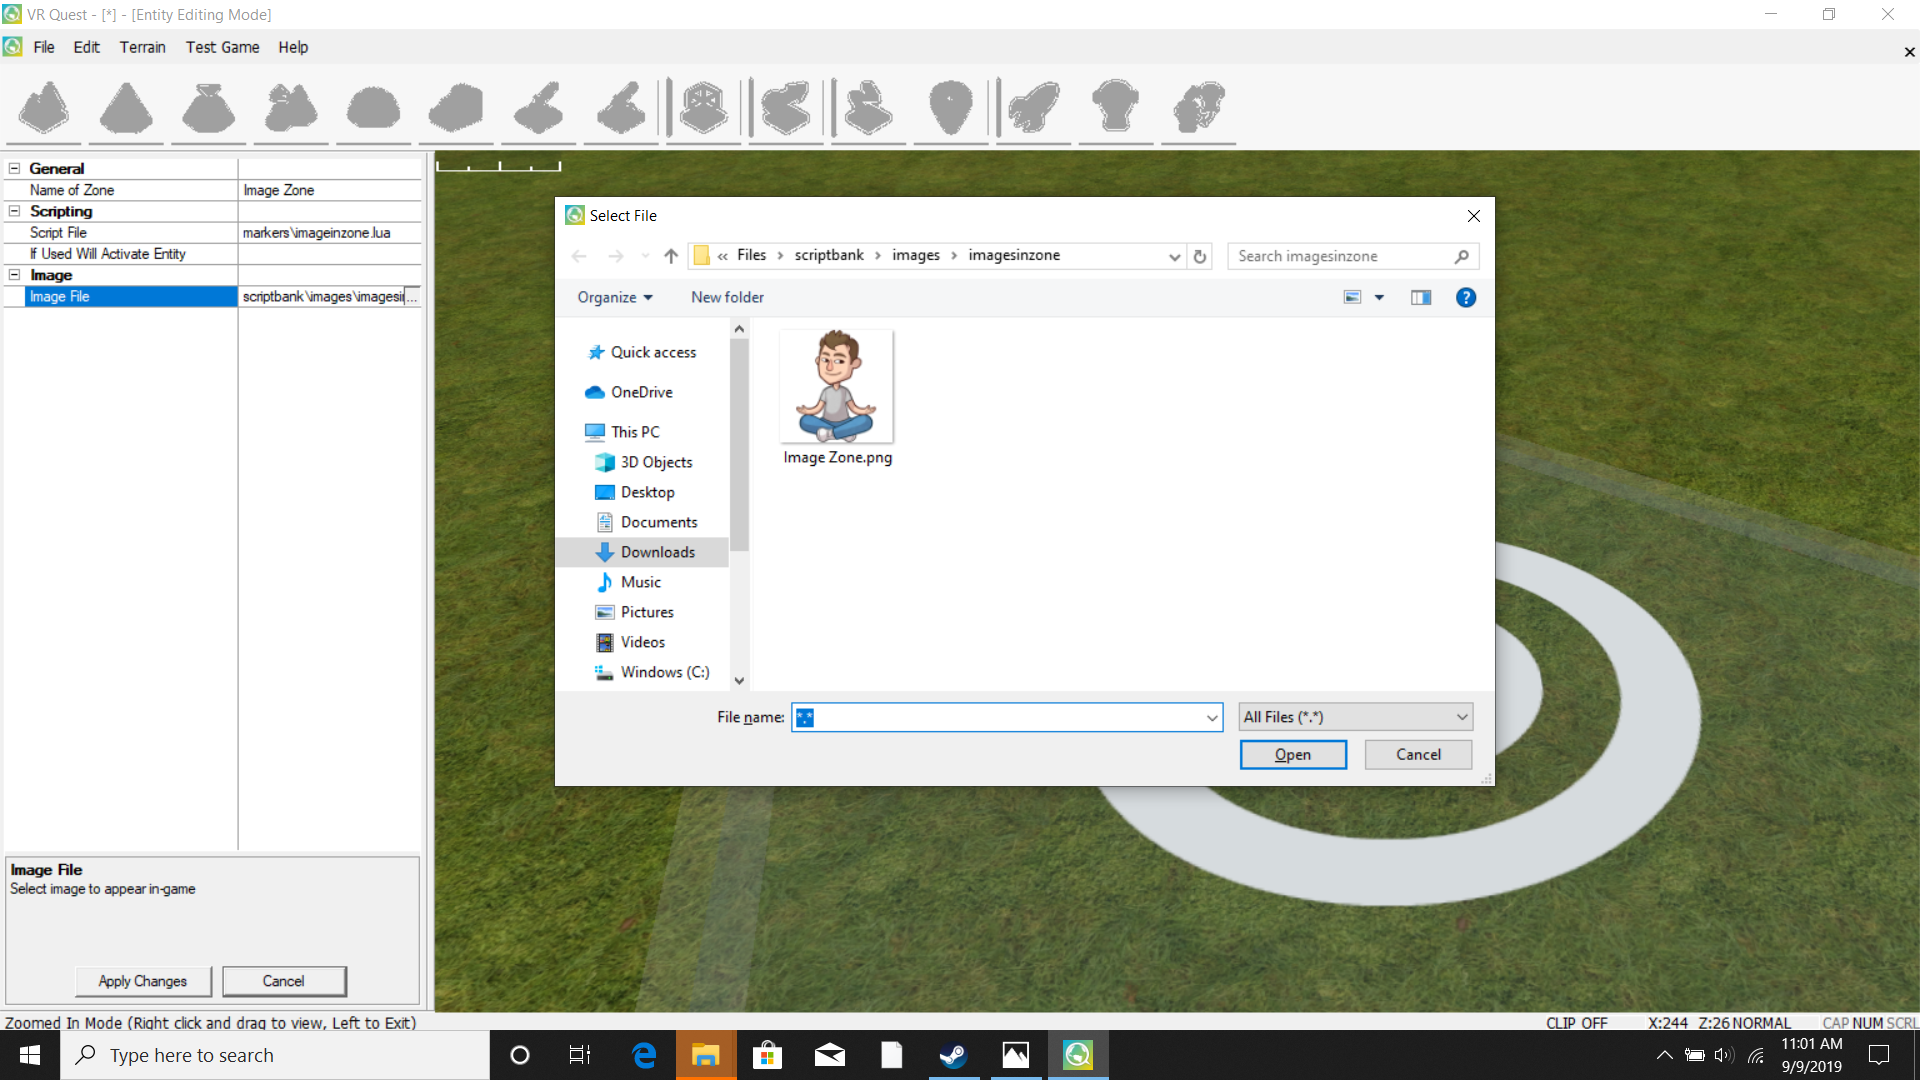
Image Zone
The Image Zone is another type of marker. Move your Editor Window view to where you want to place your trigger zone. Click Markers and select Image Zone from the Library Window (scroll down to find it). The zone icon will attach to your pointer to be placed manually with the left mouse button.
Once you have placed the marker. Select it, and then select properties. Under Image, select the three dots in the image file row. An imagezone folder will pop up. Select the image you would like to use from this folder. You must save any images you want to use in the game in this folder.

Light Zones
The Light Zone is another type of marker. Move your Editor Window view to where you want to place your light zone. Click Markers and select Image Zone from the Library Window (scroll down to find it). The zone icon will attach to your pointer to be placed manually with the left mouse button.
A circle will appear where you want to add the light. Whatever color you choose, will create a light
Once you have placed the marker.
In-Game Controls (Editing the Game While Playing)
The Launch Tool – Play the Game
Use this Rocket shaped icon to render the game and take a look at your first level. Launch the game from the toolbar by Left-Clicking on the this icon. This may take a few moments while it’s preparing your new game world.
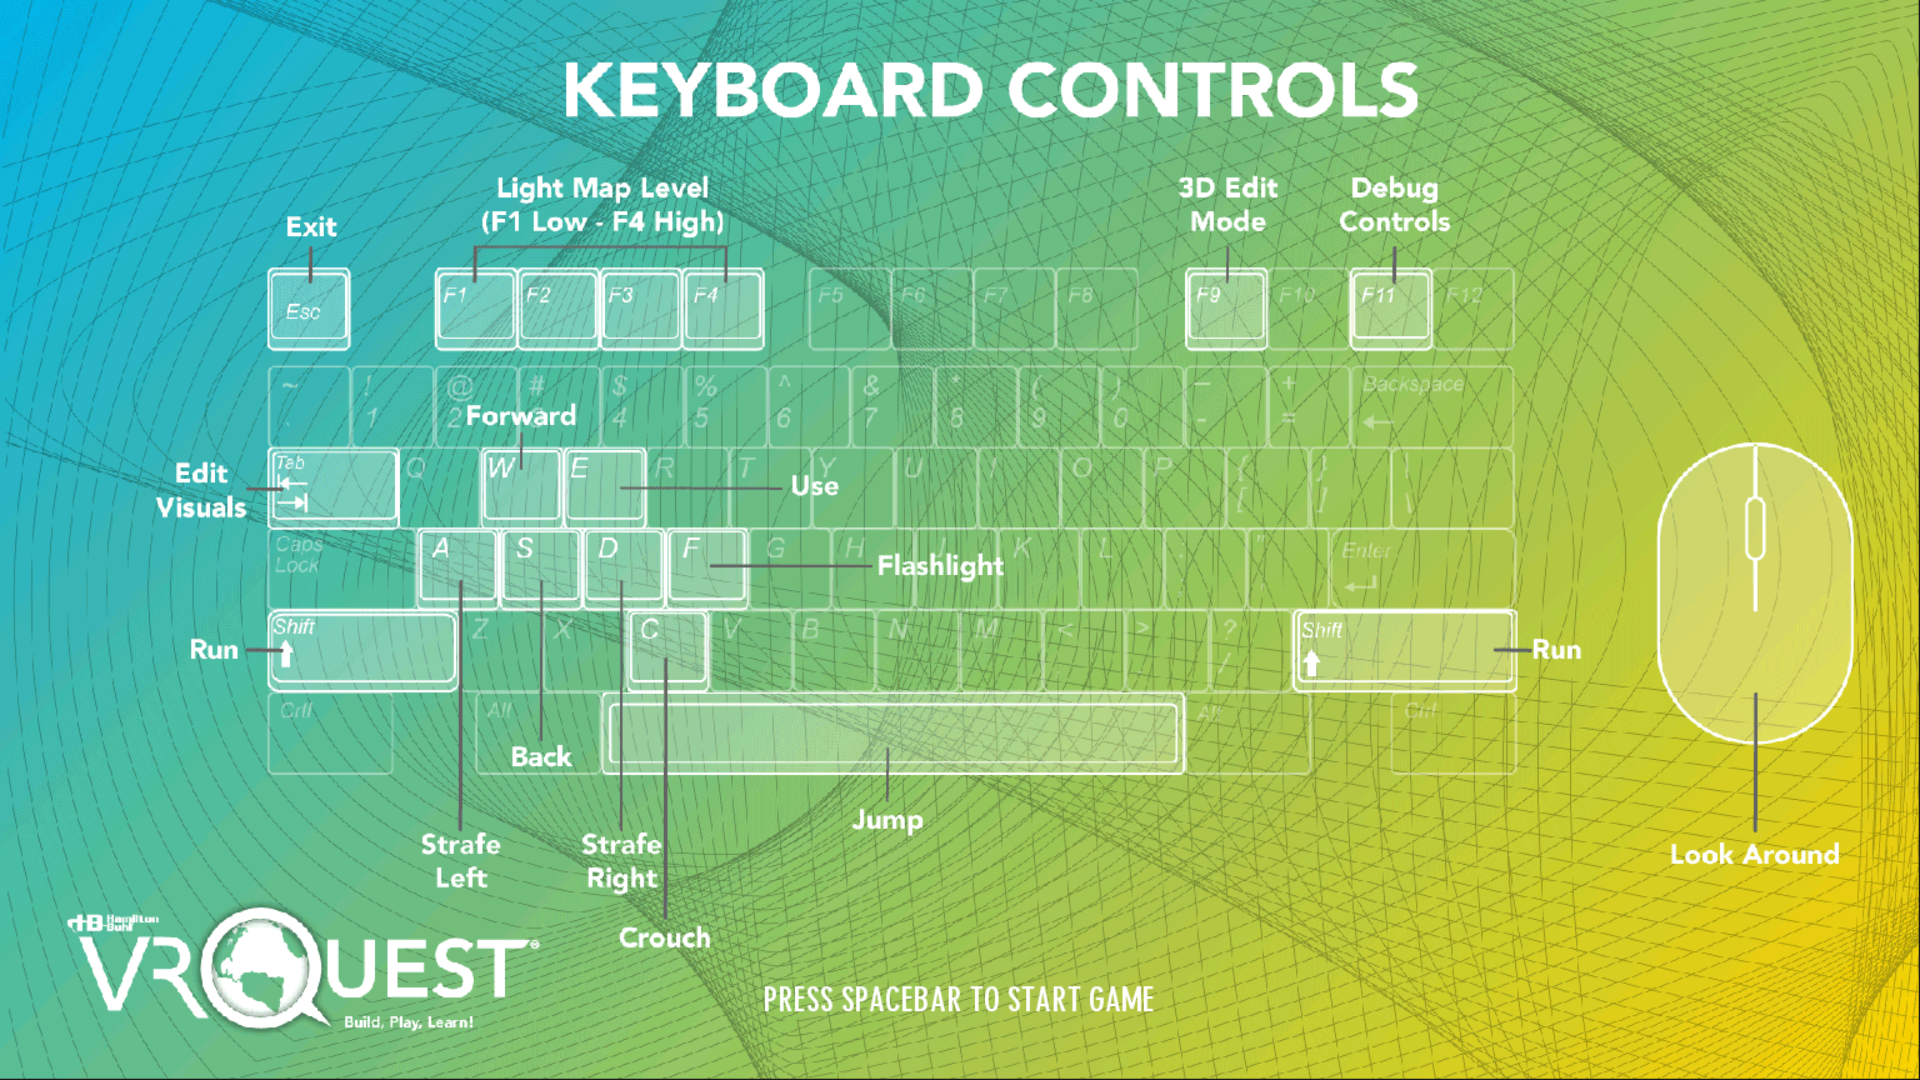
Notice the below screen summarizes all in-game controls, so you’ll be able to easily explore your map and make full use of effects and functions.
Editing While Playing
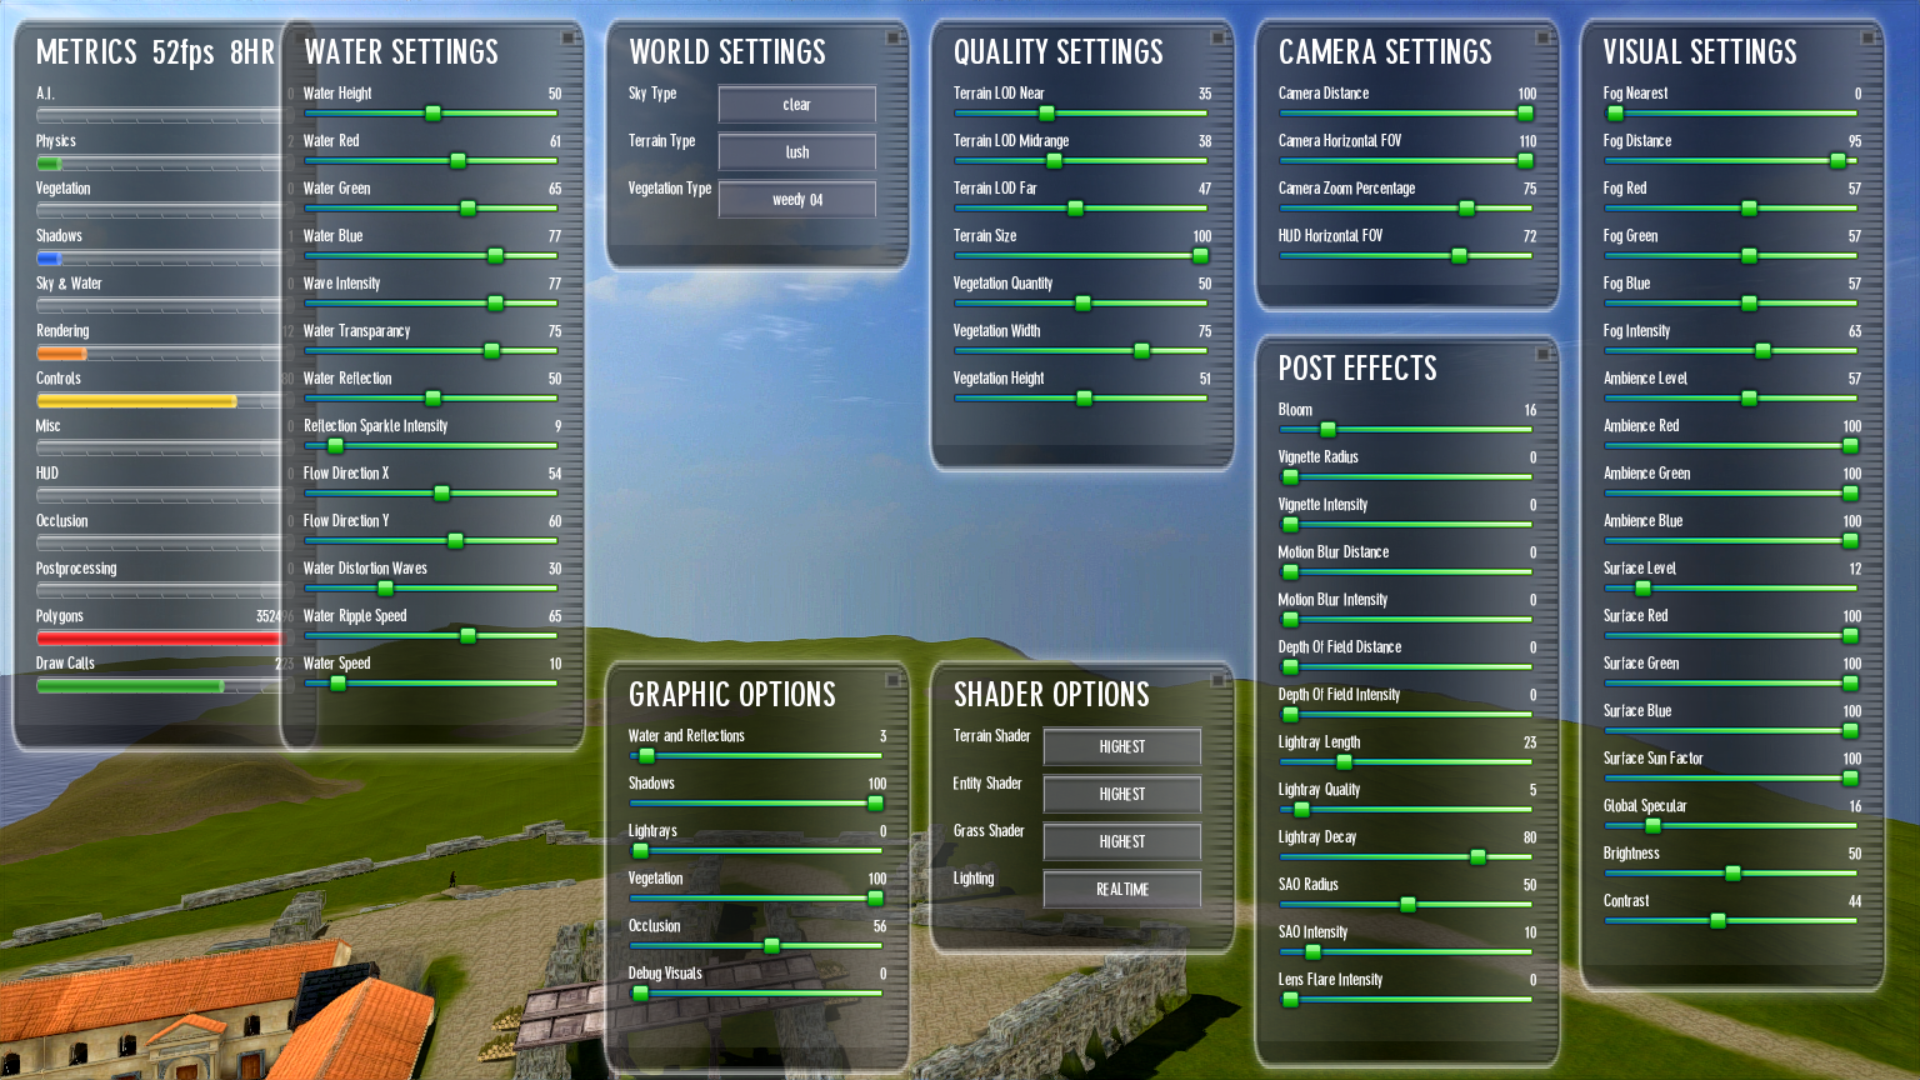
Press Tab twice to pull up the Metrics dashboard, which appears on the left of your screen. This menu gives you information about your environment like vegetation, rendering levels, and controls. The bars indicate the amount each title provides. For example, the Polygon title will tell you how many polygons you have created in the world. See the image below to view all of the metrics that are available to monitor or view.
The first menu is Water Settings, where you can edit the water height, color, intensity, transparency, reflection, flow, speed and more while playing. To adjust the setting, slide the bar to the left or right to achieve the setting you would like.
The second menu, World Settings, lets you adjust the sky type, terrain type, or vegetation type. To edit any of these settings, press the setting then choose an option from the drop down menu. For example, try changing sky type from cloudy to cartoon. You should see a rainbow in the background once you select cartoon. Terrain will change the ground or terrain. For example, try changing the terrain from lush to ice. You should see that your environment has become icy. The last setting, Vegetation, will change your grass.
You will notice other options are also available, try each of them out for yourself.
The third menu, Graphic Options, let’s you adjust the graphics. Slide the horizontal bar to adjust visual effects: shadows, water, reflections and more.
The fourth menu, Quality Settings, allows you to adjust the density of the terrain or vegetation. Slide the horizontal bar to make your vegetation more or less full and the terrain.
The fifth menu, The Shader Options, allows you to adjust the shade on the terrain, entity, grass or lighting. For improved performance we suggest using medium or low shaders.
The sixth menu, Camera Settings, allows you to adjust your viewing angle in the game.
The seventh menu, Post Effects, allows you to adjust special effects. You can edit things like lens flare, vignette, and motion blur.
The last menu, Visual Settings, let’s you adjust the ambiance of the environment. You can adjust fog, lighting, tones, hues, brightness, and contrast.
Press Tab again to return to game.
Edit Entities and Terrain While Playing
Press F9 to pull up the Edit toolbar. Select the the letter “T” to edit Terrain or the letter “E” to edit Entities.
Select the number that references the option on the toolbar above to edit the terrain. For example, to build mountains or create water, select the number “1”. Use the reference guide above and simply select the number of the option you want.
Icons used in the toolbar are explained in the section: “The Editor User Interface” (toolbar descriptions).
Join the active VR Quest Community for advice, ideas, or for technical support contact:
www.vrquest.com

Playing the Game in Virtual Reality
When students are ready to play their games in VR the real fun starts. Before playing in virtual reality, make sure the Windows Mixed Reality Headset and one Handset (or both if you prefer) are ready to use.
Opening the Game in VR
1. With the headset plugged into the computer and batteries in the handset, open up the VR Quest® application. The Microsoft Mixed Reality Portal will pop up as VR Quest® opens and will finish loading in the background.
If VR Quest® was already open, it’s possible the headset and handset may be asleep and the easiest way to get going playing a new game is to close out VR Quest® (save any games in progress) and the Mixed Reality Portal and open VR Quest® again to refresh.
2. Next, a student can open the game they would like to experience in VR. With the headset ready and the handset turned on, click the VR icon to kick off VR. The loading page will show VR Controls information and once the files have been loaded and the game is ready to start, you will see a message to press the spacebar.
3. After the spacebar is pressed the game will open in VR. You will see the game on the screen while the VR player will play the game in VR via the headset.
Exiting from VR
Hit the ESC key to exit out of the game in VR. The student may need to take off the headset to see the ESC key to exit. The player is now back at the editing screen of the game.

Playing the Game in VR with Others
When students are ready to share their games with others, you can have several players in the game at the same time, via multiplayer or social VR. There can be up to 8 players in the same game, however, if performance is affected, try limiting a game to fewer players at one time. The game play will be very similar to the solo VR play but the screens to get into the game are different.
Entering Social VR
Enter Social VR by clicking on the menu icon on the far right, this will bring you to the Social VR menu screens. (The game does not need to be opened beforehand as it will be loaded specially by the game hosting service once inside.)
Once in, you will see several buttons:
HOST A GAME
SEARCH FOR GAMES
BACK
ENTER TEACHER CODE
CHOOSE/CHANGE ONLINE AVATAR
The student can choose a new custom avatar or change to a different custom avatar:
Click on the CHOOSE/CHANGE ONLINE AVATAR and a screen will pop up. It will show the thumbnails for the avatars created and saved earlier during the Creating Your First Character instructions at the start of this manual. Once your avatar is selected, that thumbnail will show below the button.
Sharing/Hosting a Game
To share or host a game, click on the Host a Game button and from the list on the screen, select one of the games in the list. Then, click the Choose Level or Cancel to exit.
The files listed on this screen are the same map level filenames that you see when you go to the File > Open menu in the main editor screen.
Once you click Choose Level, you will be sent to the game hosting area. This will list all the players who have chosen to join the game.
You can also choose to Start Game or Leave the Game.
You will see the messages about sharing the game and the VR Controls loading screen will popup and when ready the player hosting can press the spacebar to get into the game.
Joining a Shared Game
The other 1-7 players will click on the Search button and will be taken to a list showing games that are being shared.
Then, they should select the game from the list, and click the Join Game button (or the Cancel button to not join the game).
The players who have selected a shared game will also see the list of players in the same game. Once the host starts the game, they will see that files are being shared from the host game and will see the progress of the files getting downloaded.
Then, you will see the VR Controls screen, loading up the main application files.
The final step is to click on spacebar, then put on the headset and grab your one or two handsets. Once inside the game you will see the other players and can begin the game.
Exiting a Social VR Game
Hit the ESC key to exit out of the game in VR. The student may need to take off the headset to see the ESC key to exit.
Then, press the Back button to get back to the editing screen. Only the host will have access to the game files that were hosted during this time from their computer.
Entering a Teacher Code
Usually, students can only see games shared from within a school or district; anyone using a specific installed license key. The teacher code will allow the machine to see any game shared across all VR Quest® installs.